
Texturizing Shears: What They Really Do and How to Use Them for Movement
Here is a fact that surprises most buyers: two respected scissor makers describe texturizing shears in nearly opposite ways. Japan’s Joewell files its texture models at a cut rate of about 10 to 30 percent. Germany’s Jaguar says texturizing shears take out about 40 to 50 percent of the hair per cut. Same name, very different tool.
Quick answer: texturizing shears are toothed scissors that cut only part of each section you close them on, so they leave strands at mixed lengths. That creates separation, movement and a piecey finish rather than simply less weight. Because brands use the name loosely, read the stated removal rate or tooth spacing before you buy. Start with light, spaced cuts on the mid-lengths and ends, and check the hair dry.
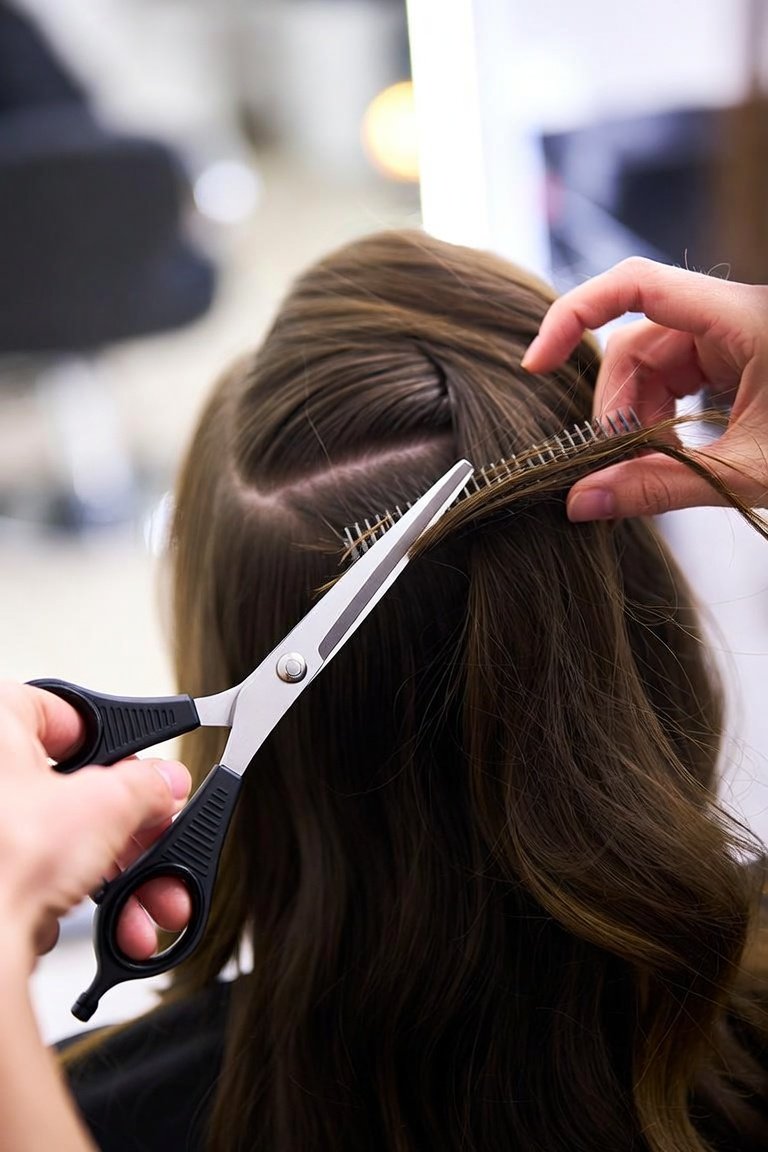
The core idea is simple. A toothed blade meets a straight blade, and only the hair caught against a tooth is cut. Wider teeth with bigger gaps take larger bundles, so the short pieces show as texture. Finer, closer teeth take smaller bundles, so the effect blends in.
That is why the label matters less than the numbers. A pair sold as “texturizing” can behave like a gentle blender or like an aggressive chunker. So the smart move is to decide what you want the hair to do first, then match the shear to that goal.
This guide covers the naming mix-up, a self-check, a hands-on method, style-by-style placement, common errors and care.
Recommended Texturizing Shears for Home and Salon Use
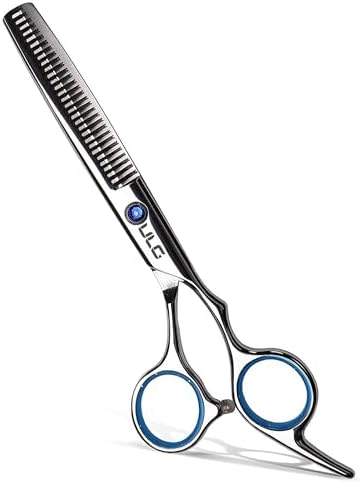
Each pick below is sold as a texturizing shear, with tooth counts and steel details on the listing. Compare the tooth count and any stated removal rate with the self-check further down before choosing. See how we test and choose products for the rules behind every pick.



Key Takeaways
- Texturizing shears cut part of a section, which leaves mixed lengths that show as movement and separation.
- The name is not standardized: Joewell lists its texture models at 10 to 30 percent, while Jaguar puts texturizing shears at 40 to 50 percent.
- Wider, more widely spaced teeth take bigger bundles and give a more visible, piecey result.
- Decide first whether you want texture or simply less weight; the answer changes which shear you need.
- Keep cuts on the mid-lengths and ends, space them out, and check the result on dry hair.
- Fine hair and curly hair need the gentlest approach and the fewest cuts.
- Clean, dry and oil the blades after use, and send them to a specialist for sharpening.

Why “Texturizing Shears” Means Different Things
If you compare a few brands, you will find the same words attached to very different tools. That is not your mistake. The industry simply has no shared standard for what counts as a thinner, a blender or a texturizer.
Two makers show the problem clearly. Joewell groups its range into volume control models at roughly 5 to 35 percent, texture control models at 10 to 30 percent, and “cut and thinning” models that remove far more. Jaguar Solingen takes another view. It describes texturizing (modelling) shears as having one serrated blade and one smooth blade and removing about 40 to 50 percent per cut. Its thinning scissors, by contrast, have serrated blades on both sides and remove about 10 to 30 percent.
| Source | What it calls texturizing | Stated removal | What that means for you |
|---|---|---|---|
| Joewell (Japan) | Texture control models within its thinning range | About 10 to 30 percent | A fairly gentle tool for adjusting texture |
| Jaguar Solingen (Germany) | Modelling shears, one serrated blade and one smooth blade | About 40 to 50 percent | A stronger tool for reducing volume and shaping transitions |
| Many online listings | Any toothed shear, often used as a synonym for thinning | Often not stated | Check the tooth count and gaps, and test on a hidden section |
So when a guide says texturizing shears “always remove more” or “always remove less” than thinning shears, treat that as one brand’s convention. The useful questions are how much hair the pair removes per close and how visible each cut will be.
Texture or Less Weight? The Difference That Matters
People often reach for texturizing shears when their real problem is weight. Others buy a thinning shear and then wonder why the hair still looks flat and solid. The two goals look similar on paper, but the results feel very different in the mirror.
| Question | Adding texture | Removing weight |
|---|---|---|
| What you see afterwards | Visible pieces, separation and movement | The same shape, just lighter and flatter |
| Size of each cut bundle | Larger, so short pieces can show | Smaller, so short pieces hide |
| Typical tool | Wider, more widely spaced teeth | Finer, closer teeth |
| Where the cuts go | Mid-lengths and ends, often on the surface | Mostly underneath and through the interior |
| Best suited to | Shags, choppy bobs, short textured cuts, blunt ends that look heavy | Thick, dense hair that puffs out or feels heavy |
If your hair looks like a solid block at the ends, you want texture. If it looks like a triangle that gets wider toward the bottom, you mainly want weight removal, and a finer thinner may suit you better. Our guide to choosing a thinner for bulk removal covers that side in depth.
Self-Check: Do You Need Texturizing Shears?
Run through this list before you buy. Count how many statements fit your hair and goal, then read the result underneath.
Tick every statement that is true for you:
- My ends look blunt, heavy or “straight across” when I want them softer.
- The style I want is meant to look piecey, such as a shag, a layered bob or a short crop.
- I have medium to thick hair with normal or coarse strands.
- Styling product separates my hair for a few hours, then it falls back into a solid shape.
- I already trim my own length and feel steady with scissors.
Four or five ticks: a texturizing shear is a good fit. Choose a moderate removal rate and focus on the ends.
Two or three ticks: start gentle. Pick a finer-toothed pair and make very few cuts per section.
Zero or one tick: you probably want a blender, a thinner, or simply a trim. Texturizing may add frizz without adding style.
How to Read Texturizing Shears Listings
Most listings give a length and a tooth count, and some add a removal percentage. Here is how to read them together.
- Tooth count: fewer teeth usually means wider gaps and bigger bundles. One retailer guide from Salon Shears Direct estimates that 7-tooth shears remove roughly 40 to 60 percent and 40-tooth shears roughly 10 to 15 percent. Treat those as rough guides, since they are not a standard.
- Stated removal rate: when a maker gives one, trust it over the tooth count. It already accounts for tooth width and spacing.
- Tooth shape: grooved or V-shaped teeth grip hair so it does not slide out. That usually means cleaner, more predictable cuts.
- Length: home pairs tend to be about 6 to 6.5 inches. Shorter blades are easier to control near the face.
- Tension screw: an adjustable screw lets you correct blades that fold hair instead of cutting it.
How to Use Texturizing Shears Step by Step
Good texture comes from small, deliberate cuts spread across the hair. Rushing is the main cause of holes, so take your time and pause often.
- Cut the shape first. Finish any length trim with regular scissors, because texturizing refines a shape rather than creating one.
- Work on dry, detangled hair. Dry hair shows you the real result, while wet hair clumps and hides how much you are removing.
- Take a thin vertical section. Lift a section about one finger wide away from the head, so the cut lands inside the hair and not on the outline.
- Place the shears on the lower half. Keep the blades on the mid-lengths or ends and angle them rather than cutting straight across.
- Close once and move. Make a single close, then shift to a new spot at a different height. Varying the height is what creates natural-looking pieces.
- Shake out and look. Run your fingers through, let the hair fall and check the mirror after every few sections.
- Style and reassess the next day. Apply your usual product, wear the style for a day, and only then decide whether you want more texture.
Where Texturizing Shears Help: Style by Style
Placement changes everything. The same pair can make a bob swing or make it look ragged, depending on where the cuts go. Use this table as a starting map.
| Style | Where to cut | How much | Goal |
|---|---|---|---|
| Blunt bob or lob | Last inch or two of the ends, inside the outline | Light | Soften the heavy edge while keeping the line |
| Shag or layered cut | Mid-lengths to ends of each layer | Moderate | Separation and movement between layers |
| Short crop or pixie | The top and crown, on lifted sections | Moderate | Piecey texture that holds product |
| Curtain fringe | The ends only, with the shears pointed down | Very light | A wispy edge that parts easily |
| Long one-length hair | Ends, and a few cuts through the interior | Light | Some swing without losing the fullness at the bottom |
Notice what is missing from the table: the roots. Cuts close to the scalp create short hairs that stand up as they grow, so they rarely help a textured style. When a section still looks heavy, a wide-tooth shear for bulk removal placed underneath may do more good than extra texture on top.
Adjusting Texturizing Shears for Your Hair Type
Hair type decides how visible each cut will be. The thicker and coarser each strand is, the more the hair can hide short pieces. Fine and curly hair show them sooner.
- Fine hair: choose the gentlest pair you can find and work only on the ends. Heavy texturizing can make fine hair look thin and wispy.
- Medium hair: a moderate pair on mid-lengths and ends usually works well. Keep the sections spaced.
- Thick or coarse hair: this type benefits most. It can take more cuts, including a few through the interior.
- Wavy hair: texture can boost natural movement. Still, check the result dry, because waves shrink and change how the ends sit.
- Curly or coily hair: go very carefully. Short cut strands can frizz or form a halo, so many curl specialists shape curls one by one instead.
Texture Gone Wrong: Habits to Keep and Habits to Drop
Most problems with texturizing shears come from a handful of habits. Here is a quick side-by-side to keep nearby while you cut.
- Finish the length before adding texture
- Vary the height of each cut
- Work in thin, lifted sections
- Check dry hair after a few sections
- Keep both sides even by counting cuts
- Stop early and wait a day
- Cut near the scalp for texture
- Stack closes in one spot
- Texturize the outline of a fringe heavily
- Judge the result while the hair is wet
- Use a wide-tooth pair on fine hair
- Expect texture to fix a bad shape
Texturizing at Home or at the Salon?
Home texturizing works best as maintenance. For example, it suits refreshing a shag between appointments or softening blunt ends that have grown out. You know your hair, and small, careful cuts carry little risk.
A stylist has two advantages, though. First, they see the back of your head and can balance both sides easily. Second, they often combine several tools and techniques, such as point cutting, razor work and texturizing shears. If you are curious about the razor route, our guide to the razor comb for soft, feathered ends explains how it differs.
A sensible split is simple. Let a professional create the textured shape once, then use your own shears lightly to maintain it.
Caring for Texturizing Shears
Teeth trap hair and styling product, so these shears need a little more care than plain scissors. A minute after each use keeps them cutting instead of folding.
- Wipe the blades and the gaps between the teeth with a soft, dry cloth.
- Open the shears and clean around the pivot, where hair collects.
- Add a small drop of scissor oil at the pivot, work it in and wipe off the excess.
- Store the shears closed in a case, away from a humid bathroom.
- Book a specialist sharpening when the teeth start to push or fold hair.
Also, cut only clean, dry hair with them. Paper, thread and synthetic fibres dull the edges fast.
Honest Limits
Texturizing shears refine a haircut. They cannot fix a shape that is uneven or too short, and they will not turn flat, fine hair into thick hair. In fact, they can make fine hair look thinner.
The published numbers have limits too. Removal percentages come from makers and retailers, not from independent testing, and they vary by brand. Tooth counts are only a rough guide. Customer ratings mostly reflect sharpness, comfort and value, not how a pair will behave on your hair.
Finally, results on curly and coily hair are the hardest to predict, even with a careful method.
When to See a Professional
Home texturizing is fine for small refreshes. Book a stylist instead when:
- You want a new textured cut, such as a first shag or wolf cut
- Your hair is curly or coily and has not been texturized before
- You need to correct a gap, step or puffy patch
- The areas you want to change are at the back of your head
- Your hair has become noticeably thinner and you are unsure why
In that last case, talk to a doctor or dermatologist first. Sudden shedding or thinning needs a medical check, not less hair.
- Hairdressing scissors: picking a main cutting pair for home or salon use.
- Barber shears: longer blades for scissor-over-comb work on short cuts.
- Offset handle shears: a handle shape that can ease wrist and elbow strain.
- Sharpening toothed shears: why teeth need a specialist and how to keep them sharp.
- Cutting a bob at home: sectioning, the line and point cutting the ends.
Texturizing Shears FAQ
What do texturizing shears do?
They cut only part of each section, so strands end at mixed lengths. That creates movement, separation and a piecey finish.
Are texturizing shears the same as thinning shears?
Not quite, but brands overlap. Some makers use the names the other way round, so check the stated removal rate and tooth spacing.
How much hair do texturizing shears remove?
It depends on the pair. Joewell lists its texture models at about 10 to 30 percent, while Jaguar puts texturizing shears at about 40 to 50 percent.
Can beginners use texturizing shears?
Yes, for light maintenance. Start with a gentle pair, cut only the ends and check your hair dry after a few sections.
Should I texturize wet or dry hair?
Dry hair is easier to judge, because wet hair clumps together. Always check the final result on dry, styled hair.
Are texturizing shears good for fine hair?
Use them sparingly. Choose a fine-toothed pair and work only near the ends, or skip texturizing altogether.
Why did my hair get frizzy after texturizing?
Short cut pieces can stick out, especially near the roots or in curly hair. Keep cuts lower on the strand and space them out.
How many teeth should texturizing shears have?
Fewer, wider teeth give chunkier texture; more teeth give a softer effect. A stated removal rate is a better guide than tooth count alone.
Can I use texturizing shears on a fringe?
Yes, lightly. Point the tips down, cut only the ends and avoid the outline so the fringe does not look gappy.
How do I keep texturizing shears sharp?
Wipe and oil them after use, store them closed and have a specialist sharpen them when they start folding hair.
Bottom Line
Texturizing shears are about movement, not just less hair. Because brands disagree on the name, choose by removal rate and tooth spacing, and decide first whether you need texture or weight removal.
Then keep the method simple: cut the shape first, work dry, place cuts low on the strand and vary their height. Stop early, style, and look again the next day. For a new textured cut or any repair, a stylist is still the safer choice.



8 Comments