
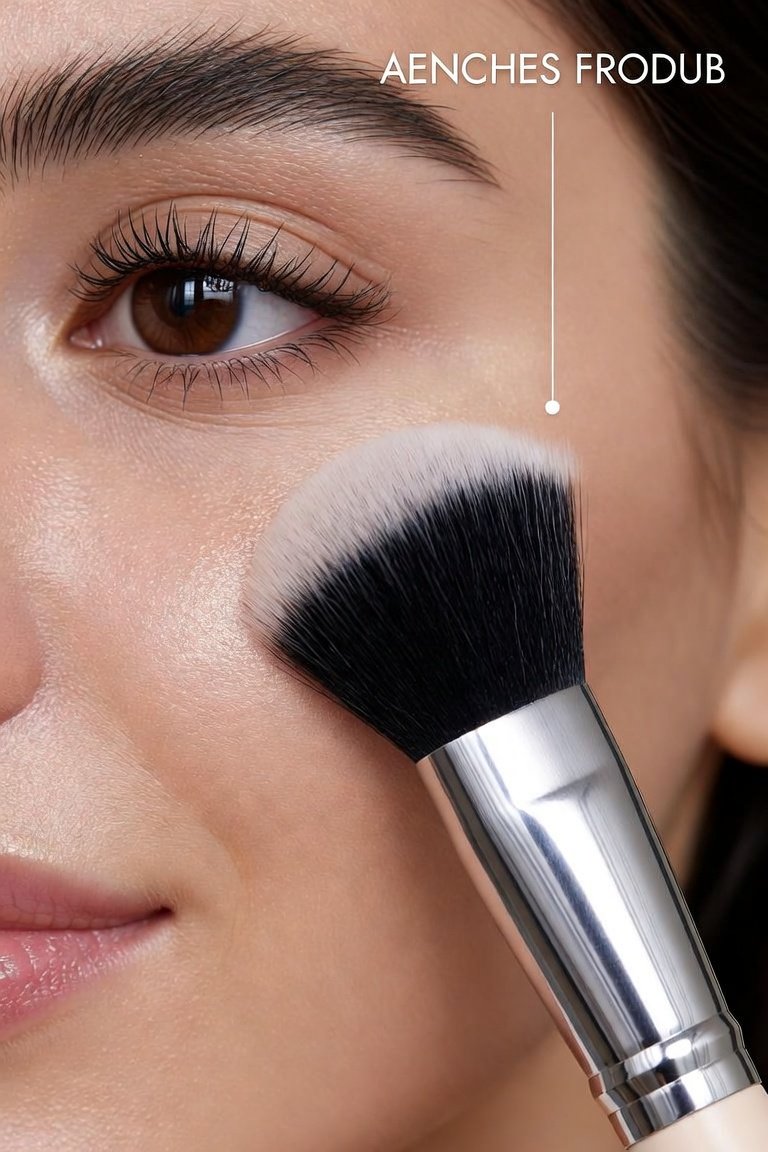
Buffing Brush Guide: How to Get an Airbrushed Base Without Streaks
Why does the same foundation look like skin on one person and like a mask on another? Often the difference is not the formula but the tool and the motion. A buffing brush is built for one job: pressing liquid or cream makeup into the skin with small circles until the edges disappear.
Quick answer: a buffing brush is a dense, short-bristled face brush, usually with a flat or rounded top, used to blend foundation in small circular motions. The packed fibers spread product thinly and push it into the skin’s texture, so the result looks smooth and even rather than streaky. Dot or stipple the product on first, then buff with light pressure, and wash the brush often because dense heads trap product.
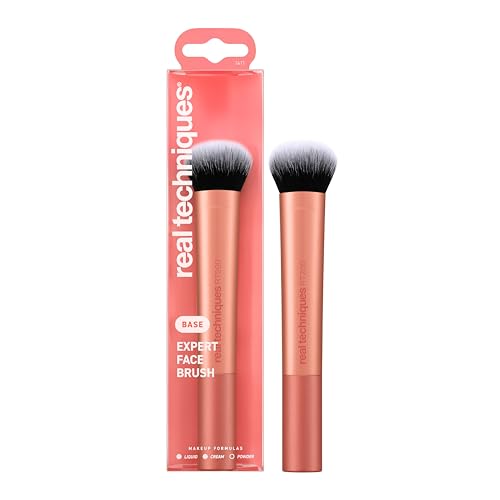
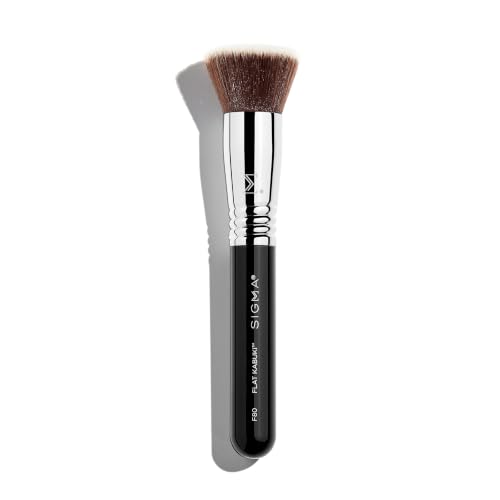
Brand instructions line up on this two-stage method. Sigma tells users of its F80 flat kabuki to stipple on liquid or cream foundation and then blend it out with circular motions. Real Techniques gives almost the same advice for its round, flat-top base brush: stipple onto the face, then buff gently.
The weak point is hygiene. A dense head holds more product and moisture than a fluffy one, and the American Academy of Dermatology recommends washing makeup brushes every 7 to 10 days. So the technique and the cleaning routine matter as much as the brush you buy.
This guide covers what buffing actually does, how it differs from stippling, a head-shape matcher, a step-by-step method, fixes for streaks and cakiness, and care.
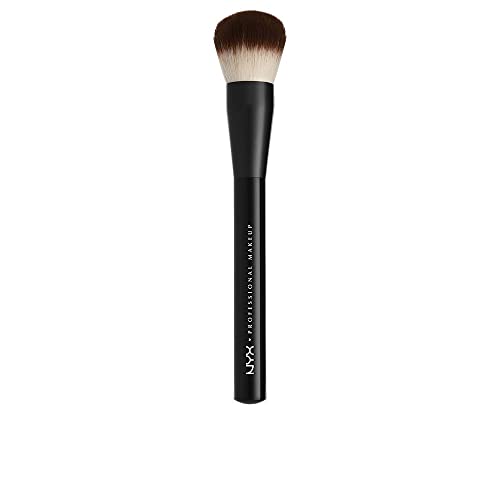
Recommended Buffing Brushes for Liquid and Cream Foundation
Every pick below is a dense buffing brush: flat-top kabuki styles for full coverage, a domed option for a softer finish, and a rounded blender for tints. Compare the head shape with the matcher further down before you choose. See how we test and choose products for the rules behind every pick.



Key Takeaways
- A buffing brush is a dense face brush that blends liquid and cream products in small circles for a smooth, skin-like finish.
- Stipple or dot the product on first, then buff. Brands such as Sigma and Real Techniques describe the same two-stage method.
- Buffing and stippling are not the same thing: buffing uses circles and a dense head, stippling uses dabs and a lighter, two-length head.
- A flat top covers large areas fast, a domed top gives a softer edge, and a small head handles the nose and under-eyes.
- Streaks and caking usually come from too much product, too much pressure, or buffing after the base has started to set.
- Dense heads trap product, so wash the brush every 7 to 10 days, as the American Academy of Dermatology advises.
- Dry the brush flat with the head hanging over an edge; upright drying lets water weaken the glue.

What Buffing With a Buffing Brush Actually Means
Buffing is a blending motion, not a way of applying product. You place foundation on the skin first, then move a dense brush in small, overlapping circles. Each circle drags a little product outward and presses it into fine lines, pores and the soft hair on the face. After a minute or so, the edges of every dot of foundation have merged, and there is no line where the product stops.
The density is what makes this work. A buffing brush packs many short fibers tightly together, so the head barely splays when you press it on your cheek. Because the fibers stay upright, they act like a soft, flexible surface that polishes product into place. A fluffy brush would bend and skate over the top instead.
That same density explains the finish. A buffed base tends to look smooth and even, with medium to full coverage, because the product is spread thinly but evenly. Sigma, for example, describes the coverage of its F80 flat kabuki as medium to full and buildable. You build coverage by adding a thin second layer, not by pressing harder.
Buffing Brush vs Stippling Brush vs Flat Foundation Brush
These three tools all apply foundation, so shops often group them together. They work in very different ways, however, and the finish changes with the motion. Picking the wrong one is a common reason a base looks heavy or streaky.
| Tool | Head | Motion | Typical finish | Best for |
|---|---|---|---|---|
| Buffing brush | Dense, short, fibers of one length | Small circles | Smooth, medium to full coverage | Liquid and cream foundation, blending edges |
| Stippling brush | Two fiber lengths, looser tips | Dabbing or pouncing | Airy, light to medium coverage | Sheer layers, tinted moisturizer, textured areas |
| Flat foundation brush | Flat paddle, tapered edge | Painting strokes | Thin layer, can leave lines | Quick application, thin fluid formulas |
In practice, many people combine two of them. They dab product on with a stippling motion, then switch to circles to blend. You can do both with one dense head. If you prefer an airier result, our guide to using a duo-fiber stippling tool explains when dabbing beats circles, and our guide to choosing a foundation brush covers the paddle style.
Buffing Brush Head Shapes and What Each One Does
Density decides how much product the brush moves. Shape decides where it can reach and how soft the edge looks. Most buffing brushes fall into one of five shapes.
| Shape | How it behaves | Good at | Watch out for |
|---|---|---|---|
| Flat top | Wide, even contact with the skin | Covering cheeks and forehead fast with even coverage | Can miss the sides of the nose |
| Round or domed top | Curved contact, softer edges | A natural finish and blending along the jaw | Gives slightly less coverage per pass |
| Angled top | Long side fits curves | Along the nose, cheekbones and hairline | Needs you to keep the angle consistent |
| Tapered or pointed | Small tip, wider base | Around the nostrils and under the eyes | Slow for the whole face |
| Mini or detail buffer | Same density, small head | Concealer, spot coverage, corners | Too small as your only face brush |
If you want a deeper look at the flat style, our flat-top kabuki guide compares it with rounder heads for powder as well as liquid.
Which Buffing Brush Head Fits Your Base?
Answer the four questions below. Note the letter you pick most often, then read the match underneath.
- What coverage do you want? Full and even (A), natural and skin-like (B), or just a sheer tint (C)?
- What formula do you use most? Thick liquid or cream (A), regular liquid (B), or skin tint or tinted moisturizer (C)?
- How much time do you have? Very little, so one fast tool (A), a few minutes (B), or time for layers (C)?
- What bothers you most? Visible patches or redness (A), a line at the jaw (B), or a heavy, masky feel (C)?
Mostly A: a dense flat-top buffing brush. It gives the most coverage per pass and covers large areas quickly.
Mostly B: a domed or rounded buffing brush. The curved top leaves softer edges and blends well along the jaw.
Mostly C: a rounded blending brush with slightly looser fibers, or a stippling brush. Buff lightly, or dab and skip the circles.
Whatever you pick, add a small detail buffer if you use concealer. A full-size head is too wide for the inner corner of the eye and the edges of the nostrils.
How to Use a Buffing Brush Step by Step
This method follows the stipple-then-buff approach that brush makers describe. It keeps the layer thin, which is what makes buffed foundation look like skin.
- Prep the skin. Moisturize and let it sink in for a few minutes. Wet skin makes foundation slide and patch; very dry skin grabs it unevenly.
- Dot the foundation on. Place small dots on the forehead, cheeks, nose and chin, or put a little on the back of your hand and dip the brush tip into it.
- Stipple first. Tap the flat of the brush over each dot to spread it slightly. This stops the brush from dragging a thick streak across the face.
- Buff in small circles. Work outward from the center of the face with light pressure and small, overlapping circles. Let the fibers do the blending.
- Blend the edges. Take the product down past the jawline and toward the hairline with the product left on the brush, so there is no visible line.
- Build where needed. Add a second thin layer only where you want more coverage, such as around the nose or over redness, and buff again.
- Finish and set. Press gently over any texture with a nearly clean brush, then set with powder if your skin or formula needs it.
Buffing by Formula: Liquid, Cream, Powder and Primer
A buffing brush handles more than one product, but the technique changes with the texture.
Liquid foundation. This is the main use. Stipple, then buff with light circles. If the formula dries fast, work one area of the face at a time so the edges stay blendable.
Cream and stick foundation. Cream needs a little more warmth and pressure to move. Swipe the stick onto the skin, then buff in slow circles. A dense flat top grips thick formulas better than a loose head.
Powder. You can buff pressed or mineral powder for more coverage, because the dense fibers press product into the skin. For a light, sheer set, a fluffy powder brush is the better choice. A loose head spreads powder over a wider area, so each spot gets less.
Primer and cream blush. A clean, small buffer blends primer smoothly and softens the edges of cream blush and bronzer. Use a separate brush for color so it does not muddy your base.
Adjusting Your Buffing Brush Technique for Your Skin
The same buffing brush can give different results on different skin. Small changes in pressure and product fix most problems.
- Dry skin: buff gently and briefly. Heavy circles can lift flakes and make them show. Moisturize first and use less product.
- Oily skin: buff until the product sets into the skin, then press rather than rub over the T-zone. Too much rubbing can move the base as oil builds.
- Textured skin or enlarged pores: stipple more and circle less. Pressing fills texture more evenly than repeated sweeping.
- Sensitive skin: choose soft synthetic fibers and light pressure. Constant friction can leave the face pink before you start.
- Acne-prone skin: keep the brush very clean and avoid scrubbing over active spots. Dab product onto blemishes instead.
Fixing Streaks, Patches and Caking
Most buffing problems come from a handful of habits. Once you know the cause, the fix is usually quick.
- Stipple before you start the circles
- Keep the pressure light and let the fibers work
- Work in one area at a time with fast-drying formulas
- Add a thin second layer only where needed
- Blend past the jaw toward the neck
- Wash the head often, as dense fibers trap product
- Pour a large pool of foundation onto the brush
- Press so hard the fibers bend flat
- Keep buffing after the base has set
- Rub over dry flakes or active breakouts
- Use a stiff or dirty brush, which leaves drag marks
- Store the brush damp in a closed bag
Streaks usually mean the brush dragged product in one direction or the head is dirty. Patches suggest the skin was still damp or the formula set before you blended. Caking almost always means too much foundation or too many layers. Start again on that area with a clean brush and less product.
Cleaning a Dense Buffing Brush Properly
A tight head is great for blending, yet it is hard to rinse. Product works its way down to the base of the fibers, where it builds up if you only wash the tips.
The American Academy of Dermatology advises washing brushes every 7 to 10 days. It warns that dirty brushes collect dirt, oil and bacteria that can lead to breakouts, rashes and infections. Real Techniques suggests weekly cleaning for its round base brush, which fits the same window.
Here is a simple routine based on the AAD method:
- Rinse the tips under lukewarm water, pointing down, without soaking the whole head.
- Swirl the tips in a bowl of lukewarm water mixed with a little gentle or clarifying shampoo.
- Massage the fibers in your palm to push the lather toward the base.
- Rinse under running water, then repeat until the water runs clear.
- Squeeze out moisture with a paper towel and reshape the head.
- Lay the brush flat with the head hanging off the counter edge to dry.
Between washes, wiping the brush on a clean towel after each use keeps product from hardening. If a dense head stays damp for a long time, it may need longer drying before you use it again.
What to Look For in a Buffing Brush
You do not need a premium brush for a good result. Instead, check a few details that affect blending and lifespan.
- Density: press the head into your palm. It should hold its shape and barely spread. A floppy head will not buff.
- Fiber type: synthetic fibers suit liquids and creams, because they absorb less product and wash easily.
- Softness: dense does not have to mean scratchy. Soft tips glide without leaving drag marks.
- Head size: a large head covers the face quickly; a smaller one gives control. Many people keep one of each.
- Handle and ferrule: a firm ferrule that does not wobble means less shedding. A handle that suits your grip makes small circles easier.
Marketing words such as “airbrushed” and “flawless” are common on listings. They describe the goal, not a measured result, so compare shape and density instead.
Honest Limits
A brush cannot change what a foundation is made to do. If a formula is the wrong shade, oxidizes or clings to dry patches, buffing will soften the problem but not solve it.
Buffing also takes a little more time than dabbing on product with fingers. Some people prefer fingers for sheer tints, because warmth helps thin formulas melt in. A damp sponge gives a similar natural finish with less friction, though it absorbs more product.
Finally, no source shows that any single brush shape gives the best result for everyone. Coverage, skin type and personal taste all play a part. Treat the matcher above as a starting point and adjust from there.
When to See a Professional
Most people can learn to buff foundation at home. It still helps to ask for outside help when:
- You have a wedding, photoshoot or event and want a base that holds up in photos.
- You cannot find a shade or finish that looks natural on you.
- Your skin gets red, itchy or bumpy after makeup, even with clean tools.
- Breakouts flare where you apply foundation and changing products has not helped.
A makeup artist can help with product choice and technique. For rashes, irritation or acne that does not settle, see a dermatologist.
- Round kabuki brushes: domed brushes for powder, bronzer and mineral makeup.
- Powder brushes: choosing a soft brush for loose and pressed powder.
- Setting powder brushes: smaller, denser brushes for setting under the eyes.
- Washing makeup brushes at home: safe soaps, water temperature and drying.
- Beauty blender vs brush: a side-by-side on finish, coverage and care.
- Beauty sponge damp or dry: when each gives a better finish.
Frequently Asked Questions
What is a buffing brush used for?
It blends liquid and cream foundation into the skin with small circles, giving a smooth finish with medium to full coverage.
Is a buffing brush the same as a kabuki brush?
Often, yes. Many buffing brushes are kabuki-style, which just means short and dense. Check the head shape and density rather than the name.
Can I use a buffing brush for powder?
Yes. It presses powder in for more coverage. For a light set, a fluffy powder brush works better.
Should I buff in circles or stipple?
Do both. Stipple the product on to spread it, then use small circles to blend the edges.
Why does my foundation look streaky with a buffing brush?
The brush may be dirty, too stiff or dragging product in one direction. Clean it, stipple first, and use light circles.
Flat top or round buffing brush: which is better?
A flat top gives more coverage and speed. A rounded top leaves softer edges and a more natural finish.
How often should I wash a buffing brush?
The AAD recommends every 7 to 10 days. Dense heads trap product, so do not stretch it much longer.
Can I use a buffing brush with a damp head?
Slightly damp is fine and can help thick formulas spread. A wet head dilutes foundation and causes patches.
Are synthetic fibers better for buffing?
For liquid and cream products, yes. They absorb less product and are easier to clean.
When should I replace a buffing brush?
Replace it when the head loses density, sheds a lot, feels scratchy or stays stained and smelly after washing.
The Bottom Line
A buffing brush earns its place when you want foundation to look like skin rather than a layer on top. Choose it by density and head shape: flat for coverage and speed, rounded for softer edges, and small for detail.
Then keep the method simple. Dot, stipple, buff in light circles, blend past the jaw and build only where needed. Wash the brush every week or so and dry it flat, and it will keep blending cleanly for a long time.


6 Comments