

How to Clean a Facial Cleansing Brush Head in 5 Minutes (and When to Replace It)
A rinse under the tap feels like cleaning, but it often is not. To clean a facial cleansing brush properly, you have to lift off cleanser film, oil and makeup that sit between bristles or in the grooves of silicone. Water alone moves some of that around, and a head left damp afterward gives leftovers a warm place to linger.
Quick answer: right after every use, rinse the head under warm water, work a little mild soap through it, rinse again and pat it dry. Let it air-dry bristle-side down or in the open, never in a closed, wet case. Once a week, give it a deeper wash if your brand’s manual allows one. Replace bristle heads about every three months, and stop using any head that is frayed, sticky or smelly.
Manufacturers do not agree on every detail. For example, one silicone brand warns against alcohol, acetone and petrol, while a beauty guide for bristle brushes suggests a weekly alcohol soak. The safe move is to check what your head is made of, and read your manual, before you pick a method.
That is why this guide separates daily cleaning, deep cleaning and replacing, then shows which methods suit which head. Clean heads also last longer, which saves effort and money in the long run.
Read on for a quick diagnostic check, a five-minute routine, a material-by-material table and a replacement schedule.
Recommended Facial Cleansing Brush Replacement Heads
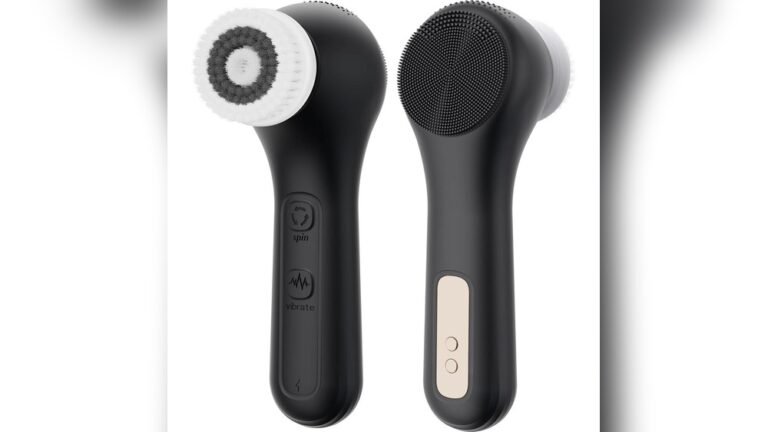
Replacing the head is part of cleaning, so these picks are replacement heads for popular cleansing brushes. Always confirm that a head fits your exact brush model before you order. See how we test and choose products for the rules behind every pick.


Key Takeaways
- A quick rinse removes some residue, but soap and a gentle rub remove much more.
- Rinse after every use, and do a slightly deeper wash weekly if your manual allows it.
- Check the head material first, because silicone and bristle heads tolerate different products.
- Alcohol soaks are suggested for bristle heads by some guides, yet silicone makers warn against alcohol.
- Dry the head completely and store it where air can reach it.
- Replace bristle heads about every three months, or sooner if they splay, smell or feel sticky.
- Keep electronics and chargers dry, and follow the instructions for your specific model.

Why a Brush Head Needs More Than a Rinse
Every session leaves something behind. Cleanser residue, skin oil, dead surface cells and traces of makeup collect where the head touches skin. Then you set the brush down damp, and the leftovers sit in a warm, moist spot.
Beauty and pharmacy guides raise the same worry. A Beautylish guide says bacteria can build up on electric and manual facial brush heads if they are not sanitized after daily use. A pharmacy guide from Jean Coutu advises replacing the head every three months to reduce bacterial growth.
Neither source tests a particular brush, and they do not prove that a dirty head causes breakouts. Even so, the advice takes little effort and costs nothing, so it is worth following.
Quick Check: What Does Your Head Need Today?
Answer these four questions to decide between a rinse, a deep clean and a replacement.
- Is the head visibly stained, sticky or clumped? If yes, it needs a soap wash now.
- Does it smell musty, or does it stay damp for hours? If yes, wash it and change how you dry it.
- Are bristles bent, splayed or shedding, or is the silicone cracked or tacky? If yes, replace it.
- Has it been three months or more since you swapped it? If yes, replace it, even if it looks fine.
If every answer is no, a rinse after each use plus a weekly soap wash will do. Any “yes” on the first two questions calls for washing today, and a “yes” on the last two means ordering a new head.
How to Clean a Facial Cleansing Brush Head in Five Minutes
This routine suits most bristle and silicone heads. Confirm any model-specific rules in your manual first, and keep the handle away from running water unless it is rated waterproof.

- Remove the head. Switch the brush off, then pull or twist the head off the handle as your manual describes, so you can reach the base.
- Rinse under warm water. Run water through the bristles or over the silicone for about 15 seconds to wash off the visible residue.
- Add mild soap. Work a drop of mild liquid soap into the head with your fingertips. A Beautylish guide suggests baby shampoo for makeup-stained bristles.
- Massage the base. Rub the bristle bases or silicone grooves for 20 to 30 seconds, because that is where oil and pigment hide.
- Rinse until the water runs clear. Leftover soap can irritate skin, so keep rinsing until no suds remain.
- Pat dry and air-dry. Shake off water, pat with a clean lint-free cloth, and set the head somewhere airy, as the next sections explain.
If you wear a lot of makeup or use a rich cleanser, add a second soap pass in step three. Heavy products cling to bristles, so one wash may only loosen them. A second pass costs thirty seconds and leaves the head noticeably softer and fresher.
Also check the head while it is off the handle. Look at the base for trapped residue, and give the metal contact points a quick wipe with a dry cloth, since moisture there can cause problems later.
Cleaning, Disinfecting and Replacing Are Different Jobs
People often use these words as if they meant the same thing. They do not, and mixing them up leads to both over-treating and under-treating your brush.
| Job | What it does | How often |
|---|---|---|
| Rinsing | Washes off loose cleanser and visible grime | After every use |
| Washing with soap | Lifts oil, makeup and film from the head | After every use if possible, and at least weekly |
| Disinfecting | Aims to reduce bacteria, for example with an alcohol soak on bristles | Weekly or less, only if your manual allows it |
| Replacing | Gives you a fresh head with intact bristles or silicone | About every three months for bristle heads, or when worn |
Disinfecting is the optional step. For most people, regular soap washing and a timely replacement already do the job.
Which Method Suits Which Head Material
Here the advice splits. Bristle heads are usually nylon and tolerate more. Silicone heads are softer and, according to makers, can be damaged by some products. Look at the table, then check your own manual.

| Method | Bristle heads | Silicone heads |
|---|---|---|
| Warm water and mild soap | Standard daily method | Recommended by FOREO after every use |
| Baby shampoo | Suggested for makeup stains by a Beautylish guide | Gentle soap is the safer bet |
| Rubbing alcohol soak | Suggested weekly for about a minute by the same guide | FOREO warns against alcohol, petrol and acetone |
| Antimicrobial skin cleanser | Mentioned as an occasional extra by the same guide | Check the manual first |
| Brand cleaning spray | Use only if your brand sells one | FOREO recommends its own silicone cleaning spray for best results |
| Boiling water or direct heat | Can warp bristles and glue | FOREO says to avoid extreme heat and boiling water |
You can see why a one-size-fits-all rule fails. If you own a silicone brush, our silicone brush guide goes deeper on that material. For vibrating bristle models, see the sonic brush guide.
After You Clean a Facial Cleansing Brush: Drying and Storage
Drying is half the job. A head that stays wet invites a musty smell, so air flow matters as much as soap.

- Shake and pat: remove surface water, then pat with a clean cloth. FOREO’s manual suggests a lint-free cloth or towel.
- Bristle-side down or sideways: let water drain away from the base rather than pooling in it.
- Open air: use a dry dish, a holder or a stand, not a closed pouch.
- Away from steam: a shower shelf keeps heads damp, so store them in a drier spot.
- No direct sun or heat: FOREO advises keeping its silicone out of direct sunlight and away from extreme heat.
When you pack for travel, make sure the head is fully dry first. A damp head in a sealed case is the fastest route to a smell.
A Simple Cleaning Schedule
Use this plan as a template and adjust it to your brand’s instructions.
| When | What to do |
|---|---|
| After each use | Rinse the head with warm water, add a little soap, rinse again and pat dry |
| Weekly | Give a longer soap wash, rubbing the base of the bristles or the silicone grooves |
| Weekly or less, if allowed | Do an optional disinfecting step that your manual approves |
| Every three months | Replace bristle heads, or sooner if worn |
| Any time | Wash and inspect after illness, a breakout flare or any contact with a stranger’s hands |
For a long-term view, think of cleaning as part of a loop: use, wash, dry, inspect, replace. Skipping any link weakens the rest. A head that is washed but never dried still stays damp, and a head that is dried but never replaced still wears out. Running the whole loop keeps both your skin and your brush in good shape.
Mistakes That Shorten a Head’s Life
Most damage comes from a handful of small habits. Fixing them is easy, and it also protects your skin.
- Wash the head after every session
- Let it dry in open air
- Check the manual before using any new product
- Use a fresh head after a skin infection
- Keep a spare head on hand
- Seal a damp head in a case
- Soak silicone in alcohol
- Scrub bristles with a hard toothbrush
- Share your head with anyone
- Keep using a splayed or sticky head
Troubleshooting Stains, Smells and the Handle
Sometimes a normal wash is not enough. These fixes cover the common cases, and each one stays within gentle methods.
- Stubborn makeup stains: use a little more soap and a longer massage at the base. If the color stays, it is usually cosmetic, but a stained head that also feels stiff should be replaced.
- Musty smell after washing: the head is probably staying damp. Dry it in open air, then wash it again. If the smell returns quickly, replace the head.
- Sticky silicone: FOREO says to stop using the device when silicone turns sticky or bubbly, so wash once and, if it persists, contact the maker.
- Hard water film: a white, chalky layer can build up in hard-water areas. Rinse with filtered or bottled water occasionally, and dry the head well.
- The handle: wipe it with a barely damp cloth and dry it at once. Never submerge a charging base, and follow your model’s waterproof rating.
- The travel case: wash it with mild soap and let it dry fully before you put a head inside.
Because every model is different, treat your manual as the final word. If it lists a cleaner or a no-go product, that instruction overrides general advice.
When to Replace the Head
A clean head still wears out. Bristles bend, glue weakens and silicone ages. Replacement is also the simplest way to reset hygiene.
- Time: Beautylish and Jean Coutu both say to swap bristle heads about every three months. WebMD adds that you should follow your manufacturer’s schedule.
- Bristles: replace them when they splay, flatten or begin to shed.
- Silicone: FOREO says to stop using the device if the silicone turns sticky or bubbly.
- Smell or stains: if a musty smell returns right after washing, the head is past its best.
- Skin trouble: after a skin infection or a bout of unexplained bumps, start with a new head.
Replacement heads are often sold in multi-packs, which makes it easy to rotate one in on schedule. Make sure the head matches your brush model, because heads are not always interchangeable.
Honest Limits
Nobody has proven how often a home brush head must be washed to prevent breakouts. The advice here comes from manufacturers and consumer guides, not from controlled trials, and it assumes ordinary healthy skin.
Product rules also differ by brand and model. Your manual outranks any general guide, including this one. If it forbids a method listed here, follow the manual.
When to See a Professional
A clean brush will not fix every skin problem. See a dermatologist or other clinician if:
- You get repeated breakouts even with a clean, new head
- Redness, burning or flaking continues after you stop the brush
- You have eczema, rosacea or inflamed acne and want to use a device
- You notice pus, crusting or spreading sores on your face
Also contact the maker if a head or handle fails early, since a defect is a different problem from poor cleaning.
- Are cleansing brushes bad for skin: safety, how often to use one, and acne.
- Rotating facial cleansing brush: how spin brushes work and who should skip them.
Frequently Asked Questions
How often should you clean a facial cleansing brush?
Rinse and soap it after every use, and give it a longer wash once a week. Replace bristle heads about every three months.
Can you clean a facial cleansing brush with soap and water?
Yes. Mild liquid soap and warm water suit most heads and are the method FOREO recommends for silicone.
How do you clean a facial cleansing brush with makeup stains?
Work a drop of mild soap or baby shampoo into the stained area, rub the base gently, then rinse until the water runs clear.
Is it safe to clean a facial cleansing brush with rubbing alcohol?
It depends on the head. A Beautylish guide suggests a weekly one-minute soak for bristle heads, while FOREO warns against alcohol on silicone. Check your manual.
Should you clean a facial cleansing brush before or after use?
After. Washing right after use removes fresh residue before it dries, and the head then has time to air-dry.
Can I put the brush head in the dishwasher or boil it?
No. FOREO says to avoid extreme heat and boiling water, and the same caution suits most heads, because heat can warp parts and loosen glue.
How do I dry a brush head quickly?
Shake off water, pat with a clean lint-free cloth and leave it in open air. Avoid sealed cases and steamy shelves.
How do I know the head is too old?
Look for splayed or shedding bristles, tacky silicone, stains that will not wash out or a musty smell. Time matters too, so replace bristle heads about every three months.
Can a dirty brush cause breakouts?
Guides warn that residue and bacteria on a head may contribute to breakouts, but no study cited here proves it. Washing it regularly is a low-risk precaution.
Should I clean the handle too?
Wipe the handle with a barely damp cloth and keep it dry, unless your manual says it is waterproof. Never submerge a charging base.
The Bottom Line
To clean a facial cleansing brush well, wash it with mild soap after use, dry it in open air and replace it on schedule. Those three habits do most of the work, and they take only minutes.
Check your manual before using alcohol or special sprays, especially on silicone. When a head looks worn or smells off, a fresh one is the easiest fix.




2 Comments