

How to Dry Makeup Brushes Without Ruining the Glue
The damage to most makeup brushes happens after the wash, not during it. A brush can handle soap, lukewarm water and a good lather for years, yet shed bristles within months if it dries the wrong way up. The reason is a thin layer of glue, and learning to dry makeup brushes with that glue in mind is the whole trick.
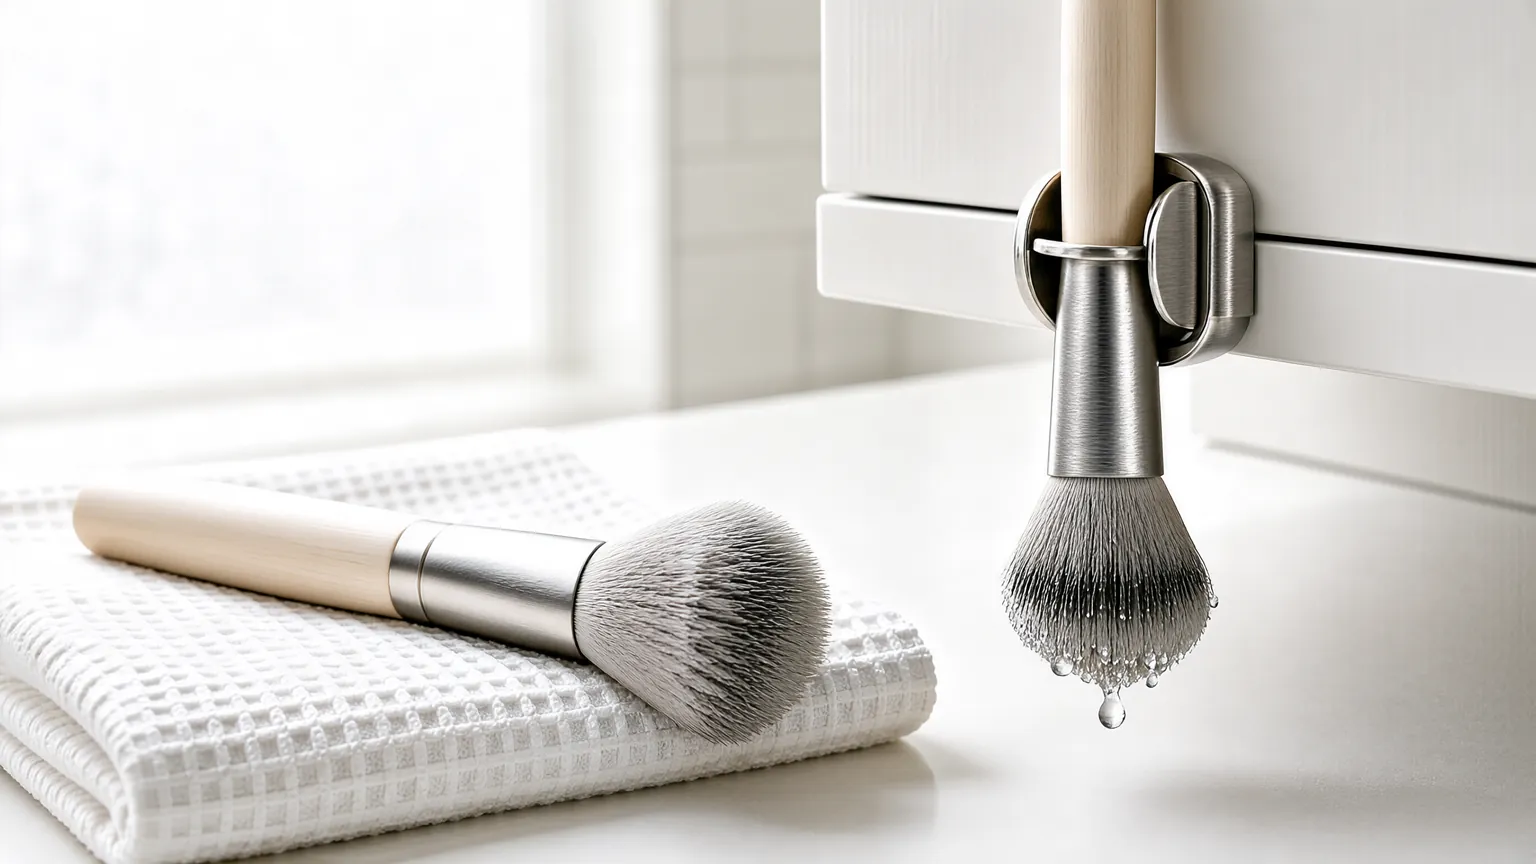
Quick answer: dry makeup brushes lying flat on a towel with the bristles hanging over the edge of the counter, or on a rack that keeps the bristles angled slightly down. Never stand a wet brush upright in a cup, because water runs down into the base and softens the glue that holds the bristles. Squeeze out water with a paper towel first, skip the hair dryer, and wait until the brush is fully dry before you use it or put it away.
This follows the American Academy of Dermatology, which says upright drying lets water run down the handle and loosen the glue. A brush brand guide adds drying-position details and warns against heat tools. Neither source ran a lab test on drying methods, so treat the advice as well-supported habit rather than proven fact.
Below you will find how the glue works, why position matters, a comparison of drying positions, rough drying times by brush size, a quick pick for your setup, what to look for in a rack, and a step-by-step routine.
Recommended Makeup Brush Drying Racks and Holders
These picks are brush drying racks, holders and a cleaning mat with a rack. Choose one that keeps bristles clear of surfaces and fits the number of brushes you own. See how we test and choose products for the rules behind every pick.


Key Takeaways
- Most brush damage comes from water reaching the glue at the base of the bristles, not from washing itself.
- Dry brushes flat with the bristles hanging off the counter edge, or on a rack that angles the bristles slightly down.
- Do not dry brushes upright in a cup or closed container; the AAD warns that water then runs down and loosens the glue.
- Squeeze out water first with a paper towel, and skip the hair dryer and other heat tools.
- One brush brand guide estimates small eye brushes dry in hours and large powder brushes in a day, so plan the wash ahead.
- Rinsing only the bristle tips during the wash protects the glue before drying even starts.
- A wobbling head or shedding bristles after a wash means it is time to replace the brush.

Why the Glue Decides How You Dry Makeup Brushes
A makeup brush has three parts. The bristles do the work, the metal band called the ferrule holds them, and the handle gives you control. The bristles are held inside the ferrule by glue, usually near the base.

That glue is the weak point. The American Academy of Dermatology warns that submerging the whole brush head can dissolve the glue that holds the head to the handle. Water that runs down from above does the same job more slowly, so the way a brush sits while it dries matters nearly as much as how you wash it.
The same logic applies to every brush shape. Flat, round, angled and fluffy heads all sit in a ferrule, so all of them share the same weak point. Short handles and long handles also behave alike: what matters is the direction of the bristles, not the length of the handle.
Think of the ferrule as a cup. If the bristles point up, water collects in the cup and soaks the glue. If the bristles point down or sideways, water drains out of the tips. That one idea explains most of the advice in this guide.
How to Dry Makeup Brushes: Flat, Angled or Upright
Different guides recommend different positions, so here is how they compare. The AAD’s method is flat with tips over the edge. A brush company guide from e.l.f. Cosmetics also approves an angled rack, with bristles slightly down and off all surfaces.
| Drying method | Where the water goes | Verdict |
|---|---|---|
| Flat on a towel, bristles hanging off the counter edge | Drains from the tips, away from the glue | Recommended by the AAD |
| On a rack at an angle, bristles slightly down | Drains from the tips, and air reaches all sides | Recommended by a brush brand guide |
| Upright in a cup or container | Runs down the handle into the base | Not recommended; loosens the glue |
| Hair dryer or other heat | Dries fast but heats glue and bristles | Avoid, per the brand guide |
| Closed pouch or case while damp | Moisture stays trapped | Avoid; it can lengthen drying and create mould |
Both recommended methods rely on the same rule: keep the bristles pointing down or sideways so water leaves through the tips.
Washing So Less Water Reaches the Glue
The easiest way to protect the glue is to keep it dry from the start. The AAD advises rinsing only the bristle tips under lukewarm running water and swirling them in a shampoo solution, not soaking the head.
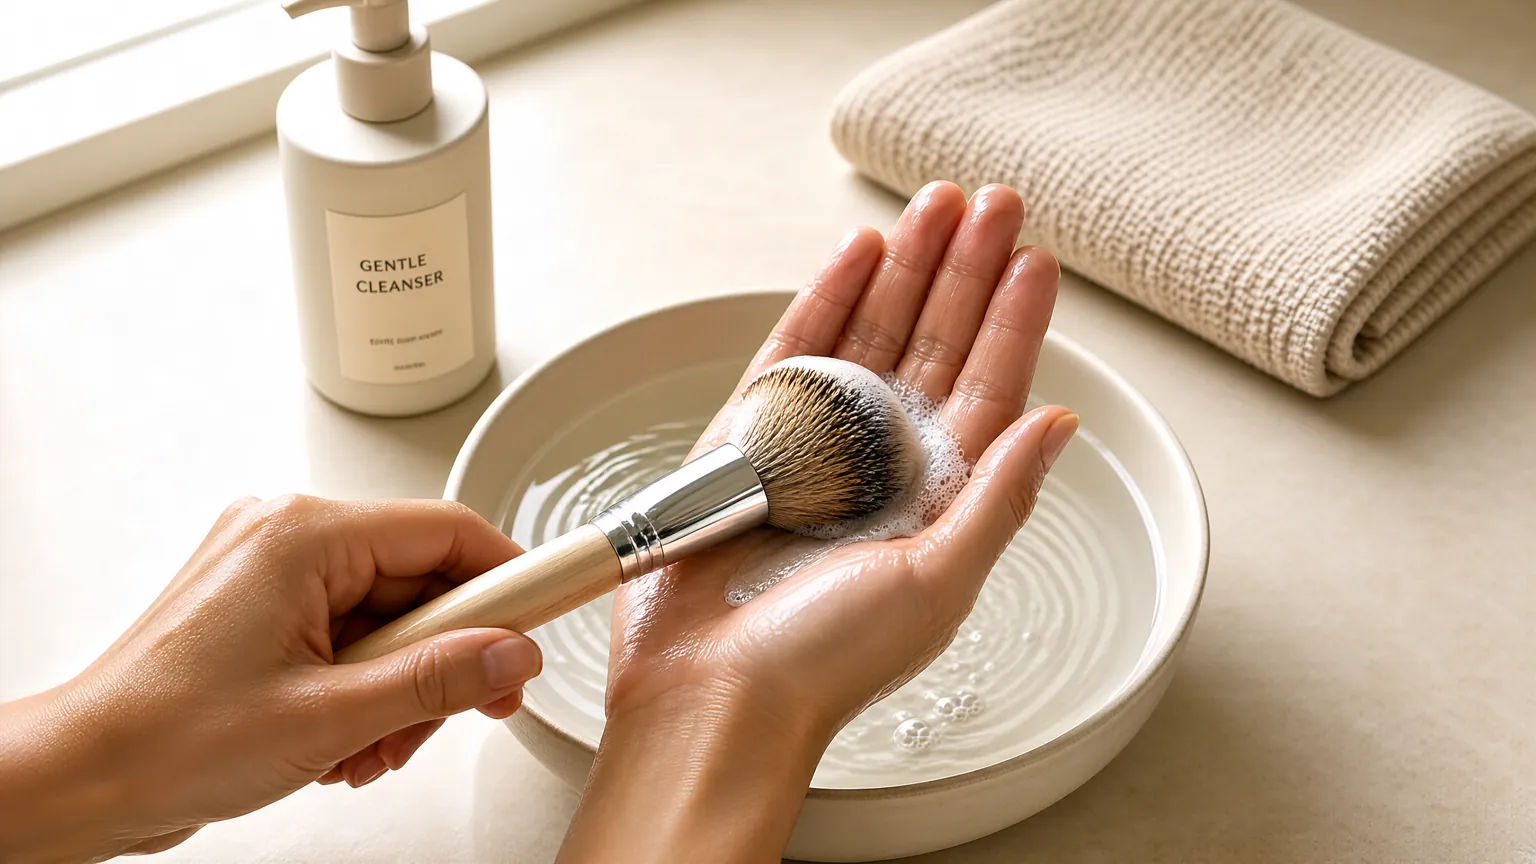
Hold the brush with the bristles pointing down so water runs off the tips. Keep the ferrule out of the stream, and avoid hot water, which a brand guide says can weaken the glue. A silicone mat or your palm helps you build lather without dunking the base.
A less wet brush also dries faster, which brings us to the drying routine.
How to Dry Makeup Brushes Step by Step
Follow these steps after every wash. They combine the AAD method with the drying details from the brand guide.
- Squeeze out the water. Press the bristles gently in a clean, dry paper towel, and do not wring or twist them.
- Reshape the head. Use your fingers to smooth the bristles back into their original shape so they dry in the right form.
- Set up the position. Lay a clean towel on the counter and place the brush so the bristles hang over the edge, or set it on a rack at a slight downward angle.
- Keep bristles clear. Make sure the bristles touch nothing. If they rest on a surface, they stay damp and flatten.
- Leave them alone. Let air do the work. Rotate or turn the brush occasionally if the rack allows.
- Check the base. Press a clean fingertip lightly near the ferrule. If it feels cool or damp, give the brush more time.
- Store only when dry. Put the brush back in its holder or case only when it is completely dry.
How Long It Takes to Dry Makeup Brushes
Drying time depends on size and density. One brush company’s guide gives these estimates. They are brand figures, not a lab measurement, and your room’s humidity will change them.
| Brush type | Estimated drying time |
|---|---|
| Small eye brushes | About 4 to 6 hours |
| Medium face brushes | About 6 to 8 hours |
| Dense foundation brushes | About 8 to 12 hours |
| Large powder brushes | About 12 to 24 hours |
These ranges explain why a daily-use foundation brush is tricky. If you wash it in the morning, it will not be ready that evening. Washing in batches the night before is the simplest fix.
Which Setup Fits Your Brushes? A Quick Pick
Answer the three questions below to choose a drying setup that matches how you use your brushes.
- How many brushes do you wash at once? One to five (A), six to fifteen (B), or more than fifteen (C)?
- How much counter space can you spare? A strip of counter edge (A), a small area (B), or very little (C)?
- Do you dry brushes overnight? Usually yes (A), sometimes (B), or I often need them the next morning (C)?
Mostly A: a clean towel with the bristles hanging off the counter edge is enough.
B answers lead: a rack with an angled holder keeps bristles clear and frees counter space.
C answers lead: use a rack, plan washes in two batches and keep a spare of any brush you need daily.
Our guides to a foundation brush and a setting powder brush explain why dense and large brushes take longest to dry. Our blush brush guide covers a mid-size tool that dries in between.
Reshaping, Speeding Up and Storing Dry Makeup Brushes
Once water is out, a few habits help the brush keep its shape and dry reliably.
- Reshape early: bristles dry in whatever shape they are in, so smooth them while damp.
- Speed up with air, not heat: place brushes in a spot with moving air, but do not use a hair dryer or other heat tools.
- Use a rack when space is tight: it keeps bristles off surfaces and lets air reach every side.
- Do not close them away: storing damp brushes in a closed container can lengthen drying and create mould, according to the brand guide.
- Return them upright only when dry: a dry brush stood in a cup is fine, because the water risk is gone.
A look at the base is the best final check, because the ferrule dries last.
Sponges and blenders follow a similar rule. An Aston University study of used makeup sponges found that most had never been cleaned, so the habit of washing and fully drying them is worth building next to your brush routine. Squeeze them out and let air reach every side.
What to Look for in a Drying Rack
A rack is optional, but it solves two problems at once: it holds brushes at the right angle, and it keeps bristles from touching a surface. Not every rack does both well, so check a few features before you buy.
- Bristle clearance: the bristles should hang free with room to spare, not press against the base or the counter.
- A slight downward angle: a rack that tilts the brush gives water an exit through the tips.
- Hole or slot sizes: look for sizes that fit both slim eye brushes and thick powder handles without squeezing the bristles.
- Stability: a rack should not tip when it holds a full set of long-handled brushes.
- Easy cleaning: silicone and acrylic wipe clean, which matters because a rack that stays damp can undo the drying.
Always dry the rack as well. A damp holder returns moisture to the brush base, so wipe it down between uses.
Mistakes When You Dry Makeup Brushes
These are the habits that loosen bristles and shorten a brush’s life.
- Squeeze water out before drying
- Dry flat with bristles over the edge
- Use a rack at a slight downward angle
- Keep bristles off all surfaces
- Wait until the base is dry
- Wash in the evening
- Stand wet brushes upright in a cup
- Use a hair dryer or heat
- Wring or twist the bristles
- Close damp brushes in a case
- Soak the whole brush head
- Use a brush before it is fully dry
Signs the Glue Has Already Failed
If a brush has been dried upright or soaked in the past, check it for these signs. They tell you whether it is worth keeping.
- The head wobbles or twists on the handle.
- Bristles shed heavily every time you use or wash it.
- Bristles splay out from the base and will not return to shape.
- The ferrule feels loose or rattles.
If two or more of these apply, replace the brush. Gluing it back rarely lasts, because water has already reached the inside of the ferrule.
Prevention is easier than replacement. A brush that is dried correctly from the first wash keeps its shape, sheds less and holds product evenly, so the habit pays off most on the brushes you use every day. If you are unsure whether a brush is salvageable, test it by gently tugging a few bristles. A handful of loose hairs is normal, but a clump that comes away means the glue is giving up.
Honest Limits
There is no published trial comparing drying methods by how long the glue lasts. The advice here comes from the American Academy of Dermatology and a brush brand’s care guide, and it fits what happens to glue and water. It is practical guidance, not a measured result.
Drying times also vary. The brand figures above depend on brush density, bristle type, room humidity and airflow. Finally, racks and holders vary in quality; ratings tell you about value and build, not how a rack will suit your counter or brush sizes.
When to See a Professional
A brush is not worth much repair, so a professional is rarely needed for the brush itself. Seek advice in these cases instead:
- You notice irritation, redness or a rash after using a brush that was damp
- A brush has a persistent musty smell even after a proper wash and dry
- You are caring for professional-grade or expensive brushes and want the maker’s advice
- A brush keeps shedding bristles despite careful drying
For skin problems that continue, a dermatologist is the right person to ask, and the brush should be replaced in the meantime.
- When to replace makeup brushes: shedding, wobbly heads and the other signs.
- Cleaning brushes without brush cleaner: safe household substitutes.
Frequently Asked Questions
How do you dry makeup brushes without ruining the glue?
Rinse only the tips, squeeze out the water and lay the brush flat with the bristles hanging over the counter edge. Do not stand it upright while wet.
Why can’t you dry makeup brushes upright?
Water runs down the handle and into the base, which loosens the glue, according to the American Academy of Dermatology.
How long do makeup brushes take to dry?
One brand guide estimates 4 to 6 hours for small eye brushes and up to 12 to 24 hours for large powder brushes, depending on size and humidity.
Can I dry makeup brushes with a hair dryer?
No. The brand guide warns against hair dryers and heat tools, because heat can weaken the glue and damage bristles.
Is it better to dry makeup brushes flat or hanging?
Both work if the bristles point down or hang over an edge so water leaves through the tips. Bristles pointing up is the problem.
Do I need a brush drying rack?
No, a towel and a counter edge work. A rack saves space and keeps bristles clear of surfaces when you wash many brushes.
How do I know a brush is fully dry?
Touch the base near the ferrule with a clean fingertip. It dries last, so if it feels cool or damp, wait longer.
Should I dry makeup brushes overnight?
Overnight is a good plan, because larger brushes can take many hours and an evening wash gives them time without heat.
Can I use a brush while it is still damp?
It is better not to. A damp brush picks up product unevenly, and moisture near the base suggests the glue is still exposed.
What should I do if the brush smells musty after drying?
Wash it again with shampoo, dry it with more airflow, and replace it if the smell returns.
The Bottom Line on How to Dry Makeup Brushes
The rule is simple: keep the bristles pointing down or sideways so water leaves through the tips and never pools around the glue. Squeeze out water first, skip the heat, and let the brush dry fully before you use or store it.
Plan washes for the evening, use a rack when space is tight, and replace any brush whose head wobbles or sheds. Careful drying costs nothing and keeps good brushes working for much longer.

2 Comments