
How to Cut a Bob at Home Step by Step: A Sectioning Guide
You can cut a bob at home if you work in sections, cut the back first and treat that first line as the guide for everything else. A bob looks simple, with one length and no fuss. That is exactly why a small slip shows on every strand.
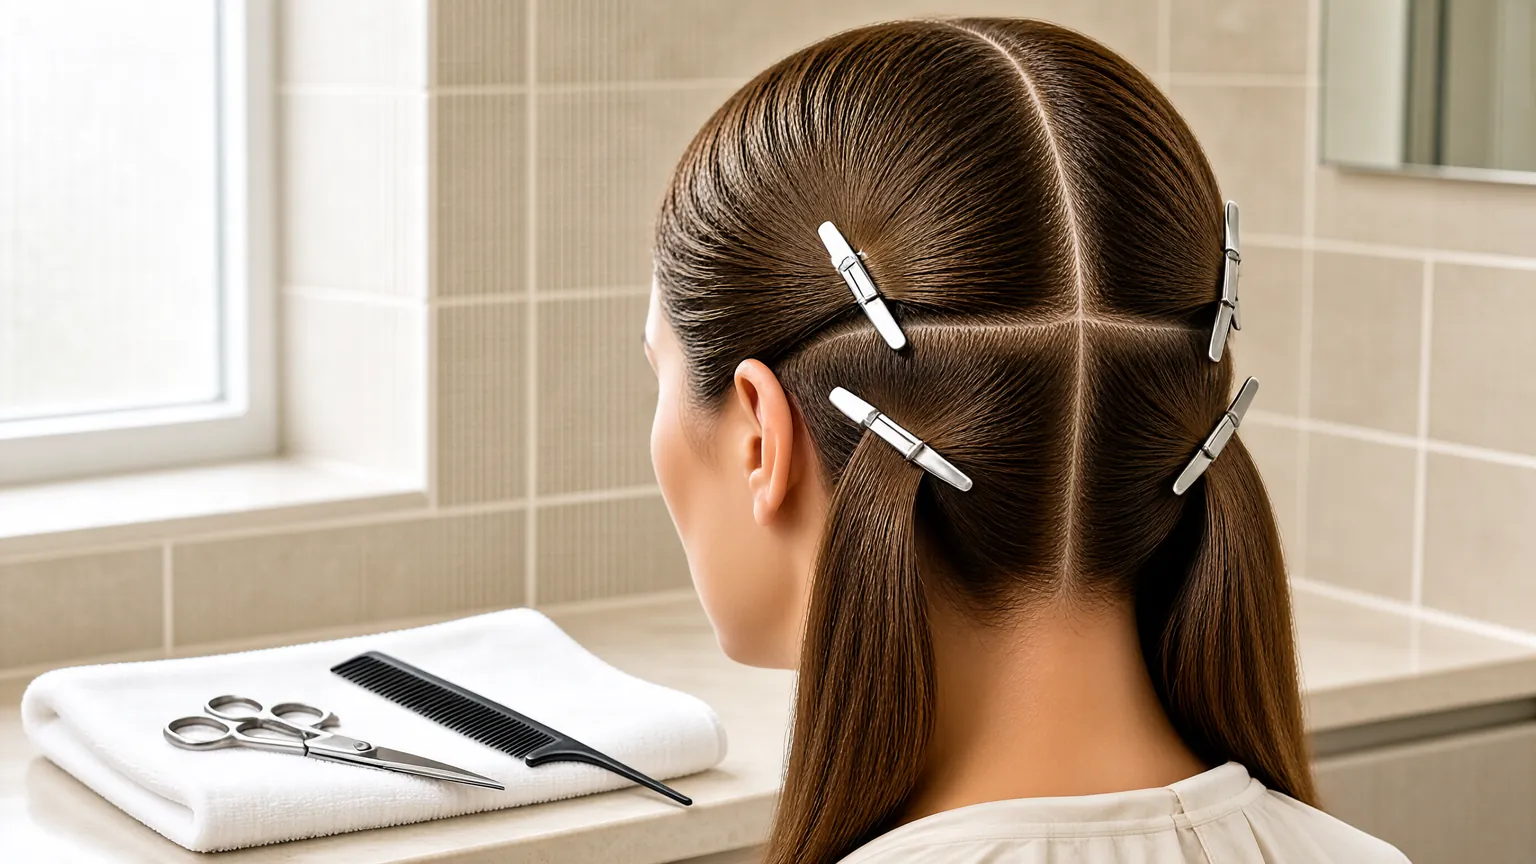
Quick answer: use a rattail comb to split dry hair into three sections, one at the back and two in front, and secure each with an elastic. Cut the back first, straight across, with sharp hair shears. Use that line as the guide for both sides and leave the front a little longer. Check both sides in a mirror before any second pass.
Curl Centric, a hair-care site run by co-founder Kenneth Byrd, warns against cutting wet hair. Strands draw up as they dry, so a wet trim ends shorter than expected. The reason is physical: Michelle Wong, a chemistry PhD who writes the Lab Muffin Beauty Science blog, explains that wet hair is weaker and stretches more easily.
The tool matters just as much. Stylists quoted by Fashion Magazine say kitchen scissors can be dull and bulky enough to shred the ends. Curl Centric also lists specialized cutting shears as the one required tool, with a razor or thinning shears as optional extras.
Below you will find a quick self-check, a step-by-step method, a table of bob shapes, the mistakes that cause a lopsided cut, and a short guide to choosing shears.
Recommended Hair Cutting Scissors Kits for a Home Bob
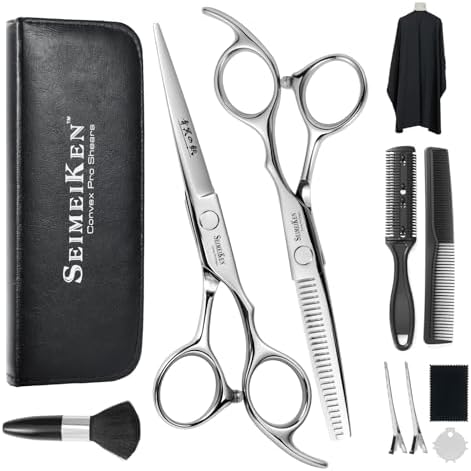
Every pick here is a hair cutting scissors kit that pairs shears with the combs and clips you need for sectioning. Check the blade length and what is in the box against the buying notes in this guide. See how we test and choose products for the rules behind every pick.




Key Takeaways
- Split dry hair into three sections with a rattail comb: one at the back and two in front, each held with an elastic.
- Cut dry, on hair styled the way you normally wear it, because wet hair stretches and then draws up as it dries.
- Cut the back first, straight across, and place the elastic low enough that the line stays level.
- Use the back section as the guide for both sides, and leave the front a little longer.
- Use real hair shears. Kitchen or school scissors can fray the ends and make the line ragged.
- Skip heavy layering, which can make a bob look puffy or round.
- Bring a reference photo, and stop early. You can always take off more, but you cannot add length back.

Why It Is Hard to Cut a Bob at Home (and Why Sections Help)
A bob has one job: a clean line. There are no layers to hide behind. If the line tilts by a few millimeters, you see it every time you tuck your hair behind an ear.
Three things cause most of the trouble. First, you cannot see the back. A mirror shows it in reverse, so a hand-held second mirror or a phone camera helps. Second, wet hair is not at its final length. Michelle Wong, a chemistry PhD who writes the Lab Muffin Beauty Science blog, explains that wet hair is weaker and stretches more easily, so a wet cut shrinks once the hair dries. Third, the tool matters. Stylists quoted by Fashion Magazine say kitchen scissors can be dull and bulky enough to shred the ends.
Sectioning solves the first problem. When the hair is split into a back section and two front sections, you cut one clean line at the back, and that line becomes the ruler for the rest. You are no longer judging the whole head at once.
The method below follows the three-section approach described by Curl Centric. Treat it as a starting point and adjust it to your own hair.
A Quick Self-Check: Which Bob Fits Your Hair?
Answer these first. They take a minute, and they help you pick a shape you can actually cut.
- Is your hair straight or lightly wavy? If yes, a one-length blunt bob is the simplest place to start.
- Is your hair curly or coily? Then plan to leave extra length and air-dry before you cut, because curls draw up more than straight hair.
- Is your hair fine and thin? Keep the bob blunt. Too many layers can make a bob look puffy or round, and fine hair shows gaps fast.
- Do you have a reference photo? Without one, it is easy to wander off course. Save one and compare as you go.
- Do you have a second mirror and good light? Set both up before you start, because the back is the part you cannot see.
If you answered “curly or coily”, keep reading the hair type section. If you have no reference photo or no second mirror, stop and set those up first.
Tools to Gather Before You Cut a Bob at Home
Curl Centric lists specialized cutting shears as required, along with a few simple extras. Gather everything first so you do not leave half your hair clipped while you search for a comb.
- Hair cutting shears. Wikipedia describes hairdressing shears as scissors made for cutting hair, usually about 5 to 7 inches long, often with a finger brace on one handle for control.
- A rattail comb. Its thin tail makes clean parts when you split the sections.
- Elastic bands. One per section keeps the hair in place while you cut.
- A wide-tooth and a fine-tooth comb. Use the wide one to detangle and the fine one to check the line.
- Two mirrors. One in front and one hand mirror let you see the back.
- Optional extras. Curl Centric also mentions a razor for shaping and thinning shears for thinner-looking ends.
A kit that bundles shears with combs and clips is a simple way to get everything at once. Look for a comfortable handle, a sharp edge and a blade length you can control, and keep any thinning shears in the kit for finishing only.
How to Cut a Bob at Home, Step by Step
Work slowly and keep your elbows steady. Check each stage in both mirrors before you move on.
- Prep dry, styled hair. Detangle with the wide-tooth comb and style the hair as you normally wear it, so you see the true length.
- Split it into three sections. Use the rattail comb to part the hair into one back section and two side-by-side front sections, and secure each with an elastic.
- Place the back elastic low. Put it below the nape of the neck. Curl Centric warns that an elastic placed too high makes the back uneven.
- Cut the back straight across. Angle the shears slightly downward and cut one straight line below the elastic. Take a little at a time.
- Use the back as your guide. Release one front section and bring it down beside the back. Match the length to the back line, then repeat on the other side.
- Leave the front a little longer. Curl Centric says to leave the hair longer toward the front, which gives the bob a soft, forward-falling line.
- Check, then refine. Comb everything down, compare both sides in the mirrors and trim tiny differences. Only then decide whether to cut more.
Take breaks. Bobs look different after you shake your head and let the hair settle. If one side still looks a hair longer, trim that side only, in tiny snips.
Setup Habits That Keep the Line Even
Plan the setup too. Stand with the light in front of you so your hands do not cast shadows on the line. Keep your head level, because tilting it while you cut moves the hair and skews the result. Between sections, comb the hair straight down and let it fall naturally. Then make your next cut. This pause also gives you a moment to compare the line against your reference photo and decide whether you really need another snip.
Blunt, Angled or Layered: Bob Shapes Compared
Many guides treat every short cut as the same thing. They are not. The shape you choose changes how hard the cut is, so pick one that matches your skill.

| Shape | How it is cut | Difficulty at home | Watch out for |
|---|---|---|---|
| Blunt bob | One straight line at one length, cut from the back around. | Easiest to plan, but every error is visible. | A tilted line, or an elastic placed too high. |
| Angled bob | Same back line, with the front left longer than the back. | Moderate. You must match both sides to the guide. | Sides that do not match in length. |
| Softly layered bob | Blunt base with a few light layers on top. | Harder. Needs a steady hand and some experience. | Too many layers, which Curl Centric says can look puffy or round. |
For a first attempt, a blunt bob with a slightly longer front is the safest choice. It gives you a clear guide and fewer decisions.
Straight, Wavy and Curly Hair: Bobs by Hair Type
Hair type changes how far the length moves after you cut. Wikipedia’s overview of hair notes that very tight curl patterns shrink visibly when wet, so a wet cut on curly hair can end much shorter than planned.
| Hair type | What to expect | What to do |
|---|---|---|
| Straight | Little change between wet and dry length. | Cut dry, in sections, with a low back elastic. |
| Wavy | Some lift as the waves reform. | Style it first, and cut a bit longer than your goal. |
| Curly | Curls draw up as they dry. | Air-dry first, as Curl Centric suggests, and cut in small steps. |
| Coily | Strong shrinkage and spring. | Leave extra length and trim in tiny amounts. A stylist who knows your texture is a good idea. |
Myths About Cutting a Bob Yourself
- “Wet hair is easier to cut.” It is easier to comb, but the length is unpredictable. Wet hair draws up as it dries, so you end up with a shorter bob than planned.
- “Any scissors will do.” Kitchen or school scissors can fray the ends. Hair shears cut cleanly, so the line stays crisp.
- “More layers make it look fuller.” Curl Centric says too many layers can make a bob look puffy or round. A blunt base keeps the shape clean.
- “I do not need a photo.” Curl Centric lists starting without a reference photo as a common mistake. A photo keeps you on target.
- “The higher the elastic, the easier the cut.” A high elastic makes the back uneven. Keep it below the nape.
Do and Don’t When You Cut a Bob at Home
- Cut dry, on styled hair.
- Use real hair shears.
- Cut the back first.
- Keep the elastic low.
- Use a reference photo.
- Check both sides in mirrors.
- Cut wet hair.
- Use kitchen or school scissors.
- Add many layers.
- Cut a big chunk in one go.
- Rush the front sections.
- Try a new cut right before an event.
Fixing an Uneven Bob Without Making It Worse
Everyone ends up with a small difference between sides. The key is to fix it slowly.
- One side is longer: Dry the hair fully, comb both sides down and trim only the longer side, a tiny bit at a time.
- The back line tilts: Re-section, place the elastic lower and cut a fresh straight line just above the old one.
- The front looks too short: Do not trim the back to match. Style the front differently and let it grow.
- The ends look ragged: A razor or thinning shears can soften them, but use them lightly and only after the line is right.
Point Cutting the Ends for a Softer Bob
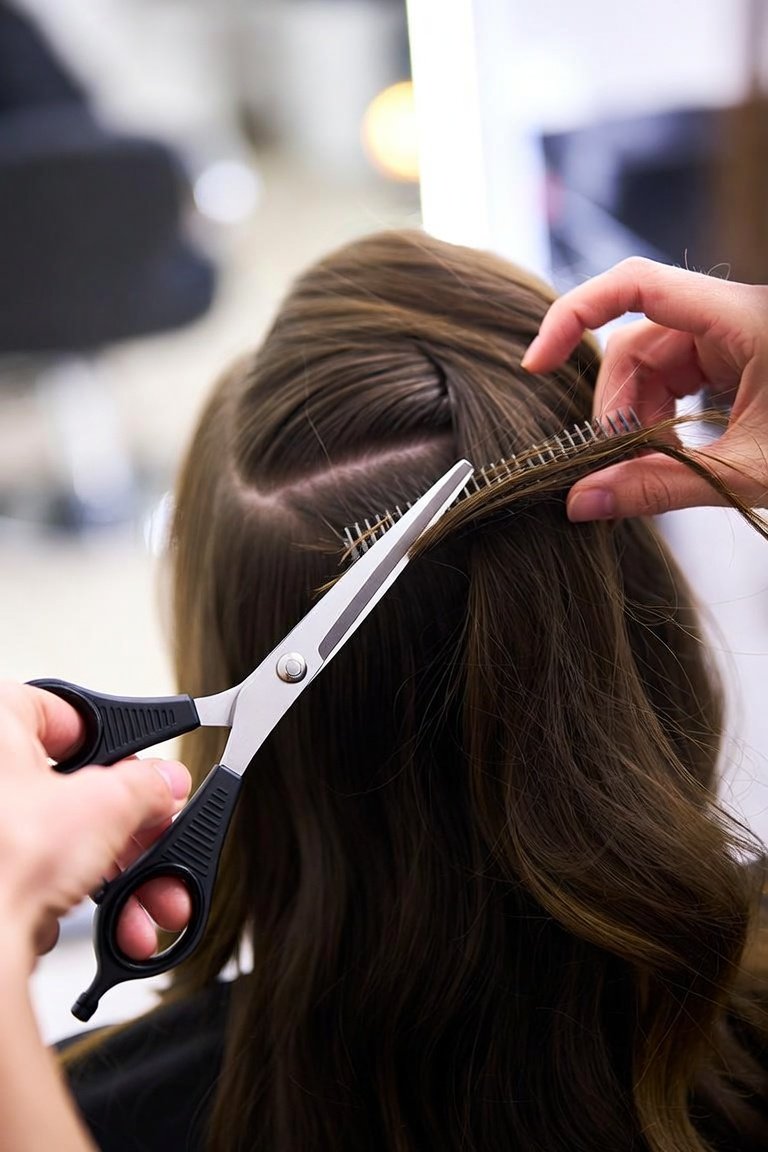
Point cutting means snipping small notches into the ends with the shears held at an angle, so the line looks softer and less blunt. Depth and angle set the result: entering the hair almost parallel removes weight, while a steeper angle mostly adds texture. It barely changes length, so it refines a bob after the main line is cut rather than replacing the cut itself.
Coarse, straight and thick hair responds best. Tight curls need a different approach, because removing weight from the ends can make them frizz. Work in small sections, take light snips and check in the mirror often; cutting too deep is the one mistake that cannot be undone.
Sharp, clean, lightly oiled shears give a cleaner notch. Home sharpening is discouraged by at least one major maker, and uneven results, damage or a big change of style are good reasons to book a stylist instead.
Honest Limits
The advice here comes from a hair-care site and from working stylists, not from controlled studies. No clinical research compares do-it-yourself bob methods, so treat the steps as practical craft knowledge. Your cowlicks, hair density and growth patterns change how a bob falls, and no written guide can predict that.
The sources also do not give exact shrinkage numbers, so this guide does not either. Leave extra length at first. This method works best on straight to wavy hair with a simple shape.
When to Book a Stylist Instead
A home bob suits a simple, blunt shape. A stylist makes more sense in a few cases. First, you want a big change, such as going from very long hair to a short bob. Second, your hair is very curly or coily, and shrinkage is hard to judge. Third, you want layers, an undercut or a precise angle. A stylist can also fix a cut that went wrong, which is often easier than a home repair.
If you do book a visit, bring your reference photo. It saves time and avoids misunderstandings.
- Choosing hairdressing scissors: how blade shape and size change control.
- Shaping ends with a razor comb: a gentler way to soften edges.
- Toothed shears for softening: when to blend instead of cut.
- Cutting your own bangs: a dry-cut method that avoids the too-short trap.
- Thinning shears guide: how to choose and use them without choppy results.
Frequently Asked Questions
Can you cut a bob at home by yourself?
Yes, with sharp hair shears, a few clips and two mirrors. Work in sections, cut the back first and keep the front a little longer.
Should you cut a bob at home on wet or dry hair?
Dry. Curl Centric warns that wet hair draws up as it dries, which leaves the bob shorter than expected. Style the hair as you normally wear it first.
What tools do you need to cut a bob at home?
Hair shears are required. You also need a rattail comb, elastic bands, a wide-tooth and a fine-tooth comb, and two mirrors. A razor and thinning shears are optional.
How do you cut a bob at home with a straight back line?
Place the back elastic low, below the nape, and cut straight across with the shears angled slightly downward. A high elastic makes the back uneven.
Can you cut a bob at home if your hair is curly?
Yes, but air-dry the hair first and leave extra length, since curls draw up as they dry. Many people with tight curls choose a stylist who knows their texture.
Can you cut a bob at home with kitchen scissors?
It is better not to. Both the Curl Centric guide and the Fashion Magazine stylists say kitchen or school scissors can fray the ends. Hair shears give a cleaner line.
How long should a bob be?
A bob usually falls between the jaw and the shoulders. Pick a length from a reference photo, and start longer than you think you need.
Should I add layers to a home bob?
Not at first. Curl Centric says too many layers can make a bob look puffy or round. A blunt base is easier to control.
How do I fix a bob that is uneven?
Dry the hair, comb it down and trim only the longer side in tiny snips. If the back line tilts, re-section and cut a fresh line.
When should I see a stylist instead?
See a stylist for a big change in length, very curly hair, layered or angled shapes, or any cut you cannot correct at home.
Should I point cut the ends of a bob?
Only after the blunt line is even. A few shallow, angled snips soften the edge; deep notches create gaps.
Does point cutting change the length?
Hardly at all. It removes weight and bluntness from the last centimetre or so, which is why it cannot substitute for a trim.
The Bottom Line
A clean bob comes from a few steady habits. Cut dry, use real hair shears, split the hair into three sections and cut the back first. Use that line as the guide for the sides, keep the front slightly longer and stop sooner than you think you should.
The sources behind this guide are a hair-care site and stylist advice, so use them as a starting point and adjust to your own hair. For the original walk-through, see Curl Centric’s guide to cutting a bob, and for the science of why wet hair behaves differently see hair, hydration and water.




2 Comments