
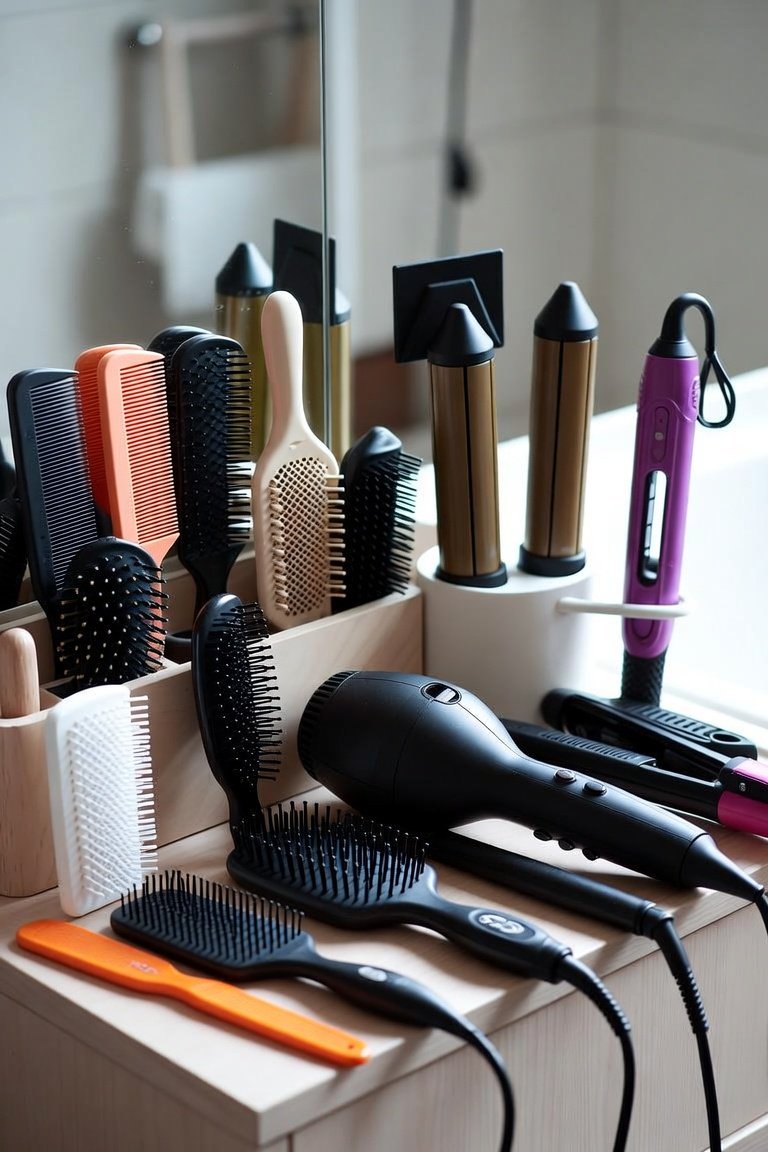
How to Organize Hair Styling Tools Safely: Cooling Zones, Holders and Cord Care
You finish with the flat iron, wrap the cord tight around the plates and push it into a drawer next to your brushes. That iron is still hot, and the cord now has another sharp bend at its weakest point. If you want to organize hair styling tools so they stay tidy and safe, the order matters: a place to cool first, easy access second, looks last.
Quick answer: give every hot tool a heat-resistant landing spot where it can cool before it goes away, and keep it clear of the sink. Store tools upright or in their own slots, with cords looped loosely rather than wrapped tight. Then keep daily tools within reach and move the rest into a drawer or cabinet. After that, do a short reset once a week so the system holds.
The cooling step is not fussiness, because South Yorkshire Fire and Rescue says hair straighteners can take up to 40 minutes to cool down. It also advises switching them off, unplugging them and leaving them on a mat or heat-proof surface. In the US, federal rules require hand-held hair dryers to include protection against shock when they contact water. That rule exists because bathrooms put plugged-in tools close to sinks and tubs.
In most homes, however, styling clutter comes from the same three problems. There is no safe spot for a hot tool to cool, cords tangle into a knot, and duplicate products fill every shelf. So once you fix those three, the space mostly organizes itself.
Finally, below you will find a quick space-matching quiz, a comparison of holder types, a seven-step setup, cord care, small-bathroom ideas and a simple weekly reset.
Recommended Organizers to Organize Hair Styling Tools
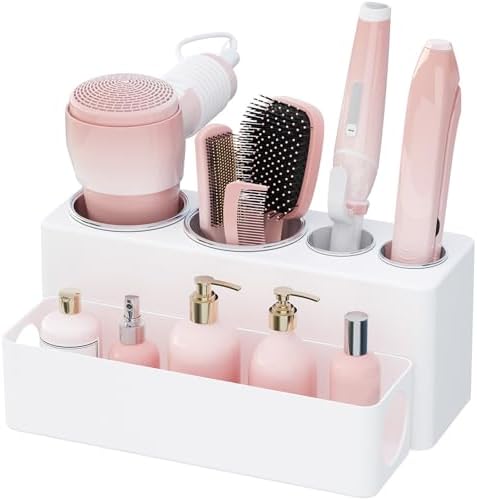
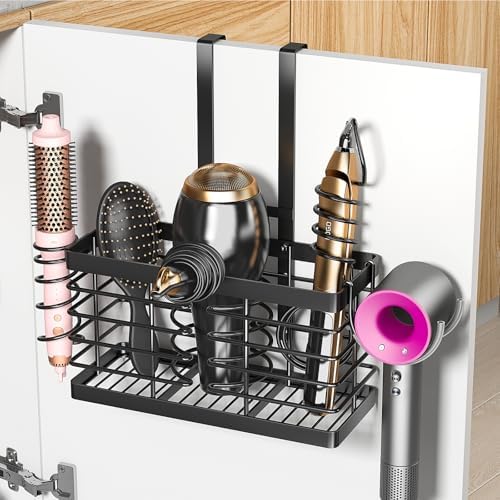
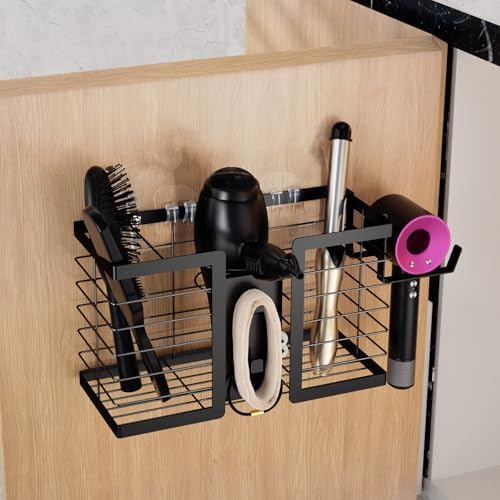
Each pick is a hair tool organizer or holder, such as a silicone mat pouch for cooling and travel, wall and cabinet-door mounts, and countertop caddies with heat-resistant cups. Check the listed dimensions against your tools and your space before you choose. See how we test and choose products for the rules behind every pick.




Key Takeaways
- Hot tools need a heat-proof spot to cool before storage; fire services say straighteners can take up to 40 minutes to cool.
- Also, unplug tools after use and keep them away from sinks, tubs and wet counters.
- A heat-resistant holder and an ordinary caddy are not the same thing; only the first is meant for tools that are still warm.
- Loose loops protect cords far better than tight wraps around the barrel or handle.
- Sort by how often you use each tool rather than by what type it is.
- Wall mounts, cabinet-door racks and countertop caddies each suit a different kind of bathroom.
- Finally, a five-minute weekly reset keeps any system working.

Three Storage Myths to Drop Before You Buy Anything
Most people start by buying a pretty caddy, because it feels like progress. However, a new container does not fix habits that caused the mess in the first place. So clear these three ideas out of the way first.
Myth 1: “It is switched off, so it is safe to put away.” Switching off stops the heating, but the plates and barrel stay hot for a long time. As a result, a warm iron in a closed drawer sits against plastic, paper and fabric. That is exactly the situation fire services warn about.
Myth 2: “Wrapping the cord keeps it neat.” A tight wrap looks tidy for a day. Over time, however, it bends the cord hard at the same spot, usually where it enters the handle. Loose loops, by contrast, look almost as neat and are far kinder to the wiring.
Myth 3: “More storage means more order.” In fact, extra bins often just hold more duplicates. Before you add storage, remove the tools and products you no longer use. As a result, you need fewer containers and you find things faster.
Heat and Water Safety Comes First
First of all, hot tools reach temperatures that can burn skin and scorch surfaces. South Yorkshire Fire and Rescue says straighteners can reach over 235 degrees and can take up to 40 minutes to cool down. Its advice is simple, so it is easy to follow: switch devices off when you finish, unplug them, and leave them to cool on a mat or heat-proof surface.
Water is the second risk. For example, the US Consumer Product Safety Commission made it a federal requirement for hand-supported hair dryers to include a device that prevents shock or electrocution when the dryer contacts water. The CPSC has also warned consumers about some hair dryer brushes that lacked this immersion protection. So a safety feature exists, but it is a backup, not permission to store tools near the sink.
Those two facts shape every decision below. In short, your setup needs a cooling zone, and it also needs distance from water.
Which Way to Organize Hair Styling Tools Fits Your Space?
First, answer these five questions. Then read the result that matches most of your answers.
- How much counter space do you have? Plenty (A), a little (B), almost none (C).
- Can you drill or stick things to the wall? Yes, I own the place (A), adhesive only (B), no changes allowed (C).
- How many hot tools do you use each week? Three or more (A), one or two (B), one, and mostly for travel (C).
- Is there a cabinet under or near the sink? Yes, with a wide door (B), yes but narrow (A), no (C).
- Who uses the space? Just me (A), shared with a partner (B), shared with kids or roommates (A, for a fixed, high setup).
Mostly A: a countertop caddy with metal or silicone cups, or else a wall mount. You have room for a permanent station, so give each tool its own slot and a cooling mat beside it.
Mostly B: a cabinet-door rack or an adhesive wall holder. It clears the counter, but only store tools there once they are fully cool.
Mostly C: a heat-resistant silicone mat pouch. First you lay the tool on it to cool, then fold it up and put it in a drawer or bag.
Renters can still do a lot with no drilling, because adhesive hooks, over-the-door racks and freestanding caddies all come out without damage when you move.
Heat-Resistant Holder vs Ordinary Storage: Not the Same Job
However, product listings often lump every caddy together as a “hair tool organizer”. In practice, there are two different jobs. One is holding a tool that is still warm. The other, meanwhile, is storing a tool that has already cooled.
| Feature | Heat-resistant holder | Ordinary storage |
|---|---|---|
| Main job | A safe place for a warm tool right after use | Keeping cool tools grouped and out of sight |
| Typical materials | Silicone mats, metal cups, heat-rated pouches | Plastic bins, wicker, fabric, wood |
| Can a warm tool go in? | Yes, within the maker’s stated limits | No; wait until the tool is cool |
| Where it sits | Open counter, wall or vanity, with airflow | Drawer, cabinet or closed box |
| Best for | Daily hot tools | Spare tools, attachments and backups |
So most homes need both. For example, a silicone mat or metal cup takes the iron for the first half hour. After that, the iron moves into the drawer or cabinet with everything else.
Storage Options Compared
Each common setup has strengths and trade-offs, so use this table together with your quiz result.
| Option | Good for | Watch out for |
|---|---|---|
| Countertop caddy with cups | Several daily tools, easy grab-and-go | Takes counter space, so keep it away from the sink edge |
| Wall mount (screw or adhesive) | Clearing the counter, holding a dryer by its nozzle | Adhesive may fail on damp walls, so check weight limits |
| Cabinet-door rack | Hiding tools in small bathrooms | Needs a wide door and depth; also, cool tools only |
| Drawer organizer | Brushes, clips, spare attachments | Never for warm tools; also measure drawer height first |
| Silicone mat pouch | Cooling at the counter, then travel or drawer storage | Small, so it holds one tool at a time |
How to Organize Hair Styling Tools Step by Step
This setup usually takes about an hour the first time. After that, it takes a few minutes a week to keep it working.
- Empty everything out. Pull every tool, brush, clip and product onto a towel so you can see the full picture at once.
- Check each tool. Look for frayed or cracked cords, loose plugs and cracked housings. Then set damaged tools aside for repair or safe disposal.
- Sort by frequency. Make three piles, such as daily, weekly and rarely. This split decides where each item lives, so be honest.
- Choose a cooling zone. Pick a heat-proof spot away from the sink, such as a silicone mat or metal cup holder, where tools rest after use.
- Give daily tools a fixed home. Next, put them in a caddy, wall mount or cabinet-door rack near an outlet, each in its own slot.
- Store the rest out of the way. Weekly tools go in a drawer or cabinet, while rarely used ones go higher up or in a labeled box.
- Loop cords loosely and label if needed. Use a soft tie or a reusable strap, and label shared tools so they come back to the right slot.
Once the system is set, the daily routine is therefore short. First unplug the tool, then rest it in the cooling zone, and finally put it away the next time you pass by.
Cord Care Without the Tangle
Cords fail most often where they meet the tool, because that spot bends every time you style. Tight wrapping, meanwhile, adds more stress to the same point. As a result, a loose loop is the single best habit for tool life.
- Coil the cord in loose loops so it bends gently
- Also secure loops with a soft tie or strap
- Let the tool cool before coiling
- Pull the plug by the plug, not the cord
- Then check cords for fraying every month
- Stop using a tool when the cord is damaged
- Wrap the cord tightly around the barrel or handle
- Coil a cord around a hot tool
- Hang a dryer by its cord, because it strains the wiring
- Pinch cords in drawers or cabinet doors
- Tape over damage instead of replacing the tool
- Run cords across a counter while it is wet
Many dryer holders grip the nozzle or body rather than the cord. That design also keeps weight off the cord, which is one more reason to choose a proper holder over a hook.
Organize Hair Styling Tools in a Small or Shared Bathroom
Small spaces force choices, so use the vertical space and the backs of doors. Still, keep the cooling zone on the counter, even if it is only a folded silicone mat. Then move cool tools up or behind a door.
- Tiny bathrooms: a cabinet-door rack plus one silicone mat usually covers most needs, so start there.
- Shared with a partner: split the caddy, or otherwise give each person one side of the wall mount.
- Shared with kids: mount hot tools high and out of reach, and keep the cooling zone at the back of the counter.
- No bathroom outlet: set up a styling spot at a bedroom mirror instead, so tools stay far from water.
Travel is another kind of small space. A mat pouch lets you cool and pack a tool in one step, and our guide on bringing hair tools on a plane covers what airlines allow in carry-on and checked bags.
Brushes, clips and small accessories
Small items create more clutter than the big tools. Use a shallow drawer divider so brushes lie flat and clips sit in their own section. Keep specialty tools, such as a topsy tail loop, with the elastics you use with it. For example, if you use one, our guide to using a topsy turvy tool for easy updos explains how it works.
Clean brushes before you put them back. Otherwise, loose hair and product build-up spread to everything else in the drawer.
How Often to Reset Your Setup
Every system drifts over time. Therefore, the trick is a short, regular reset instead of a big clear-out twice a year.
- After every use: unplug, then rest the tool on the cooling zone, and put it away once it is cool.
- Weekly: return strays to their slots and wipe the holders. Also clear hair from brushes.
- Monthly: check cords and plugs, and wipe plates when cool. Clean dryer filters as the maker directs, too.
- Twice a year: clear out unused products, and then rethink any slot that keeps overflowing.
Common mistakes when you organize hair styling tools
The biggest mistake is building a system around looks instead of heat. Other common slips include placing the caddy right beside the sink, buying a holder too small for a large dryer, and keeping backups of backups. Also, many people forget to measure. Therefore, check the height of your drawer and the width of your cabinet door before you order anything.
Honest Limits
An organizer does not make a hot tool safe on its own. Instead, the safety comes from habits such as switching off, unplugging, letting tools cool and keeping them away from water. A beautiful caddy used carelessly is still a risk.
Heat ratings on budget holders are also not always clear. If a listing does not say how much heat a holder can take, use it only for cool tools. Adhesive mounts also vary, and humid bathrooms can weaken the bond over time.
Finally, product ratings tell you about general build and fit. They cannot tell you whether a holder will fit your dryer, your wall or your cabinet door, so measure first.
When to Call a Professional
Most of this is a do-it-yourself job, as long as the wiring is sound. Still, a few situations call for an electrician or the tool’s manufacturer:
- An outlet sparks, buzzes, feels warm or trips often when you use a hot tool
- A tool smells like burning or cuts out, or else its cord or plug is damaged
- You want a new outlet near your mirror, because extension cords are a poor fix
- You plan to drill into tiled walls when pipes or wiring may sit behind them
- A tool was dropped in water; contact the maker and do not use it until they advise
If anyone gets a burn from a hot tool, follow first aid guidance and seek medical care for anything more than a minor burn.
- Removing hair tinsel: taking tinsel out with or without a clamp.
- Razor combs: how a razor comb softens and thins hair, and when to avoid it.
- Electric shavers for sensitive skin: foil versus rotary heads and how to limit irritation.
Frequently Asked Questions
What is the best way to organize hair styling tools in a small bathroom?
Use a cabinet-door rack or wall mount for cool tools, and also keep one heat-proof mat on the counter as a cooling zone.
How long should a flat iron cool before I put it away?
Fire services say straighteners can take up to 40 minutes to cool. So leave it on a heat-proof surface until it is cool to the touch.
Can I store a hair dryer in a drawer?
Yes, as soon as it has cooled. Then loop the cord loosely rather than wrap it tightly around the handle.
How do I organize hair styling tools without drilling?
Use a countertop caddy, an adhesive holder, an over-the-door rack or a silicone mat pouch. That way, nothing damages the walls when you move.
Is it safe to keep hot tools under the sink?
Only when they are fully cool and unplugged, and only if the cabinet is dry. Also keep them away from leaks and cleaning chemicals.
What should I use to organize hair styling tools that are still warm?
A heat-resistant silicone mat or a holder with metal cups that the maker rates for hot tools. Ordinary plastic bins, however, are for cool tools only.
Why should I not wrap the cord around my curling iron?
Tight wraps bend the cord hard where it meets the handle, which is where cords tend to fail. Loose loops, therefore, put less stress on the wiring.
How often should I clean my styling tool setup?
Wipe it down weekly and check cords monthly. Then clear out unused items about twice a year.
Where should I organize hair styling tools if I share a bathroom with kids?
Mount hot tools high and out of reach, and keep the cooling zone at the back of the counter, away from the edge.
Do I need a separate organizer for brushes and clips?
It helps, because a shallow drawer divider keeps brushes flat and small clips from spreading into every corner.
The Bottom Line on How to Organize Hair Styling Tools
A good styling setup starts with heat and water rather than with looks. So give hot tools a heat-proof place to cool, unplug them, and keep them away from the sink. Then sort by how often you use each tool and give daily ones a fixed home.
After that, loose cord loops and a weekly five-minute reset do most of the work. Choose the holder that fits your space from the quiz above, measure before you buy, and call an electrician for anything that sparks, smells or trips.




5 Comments